Initial Account Setup
Creating a setup definition
Open the definitions view

Add a new definition

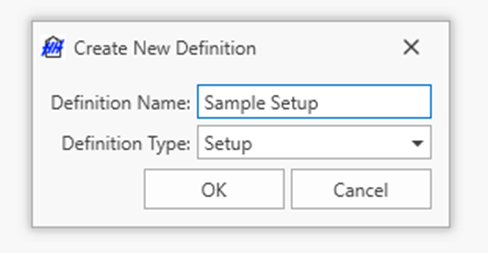
Select this setup from the drop-down menu

Adding a basic parameter
You can now add parameters to the definition. For example, you can add the corner weights as Double parameters with the desired units:
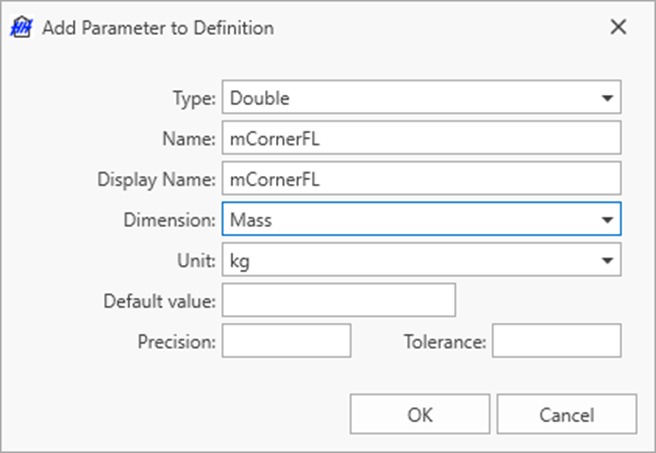
You can create the 4 corner weights:

Adding a math parameter
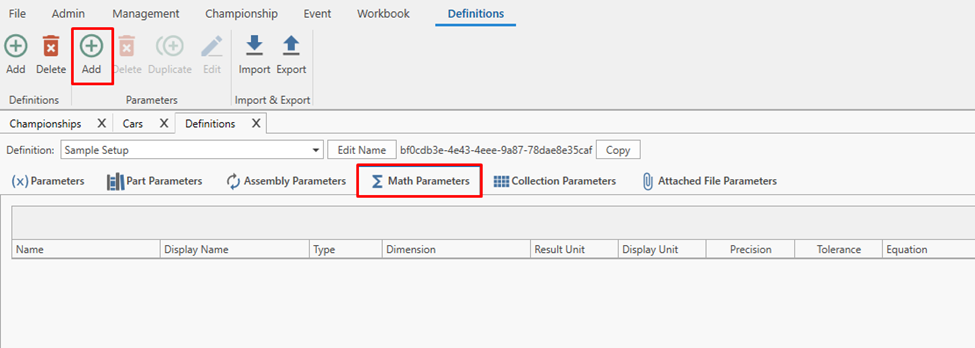
Next, you can add a math parameter to calculate all the weight metrics (e.g. weight distribution and cross weight). Select the Math Parameters tab and then click the Add Parameter button
You could define a math parameter to calculate the total weight
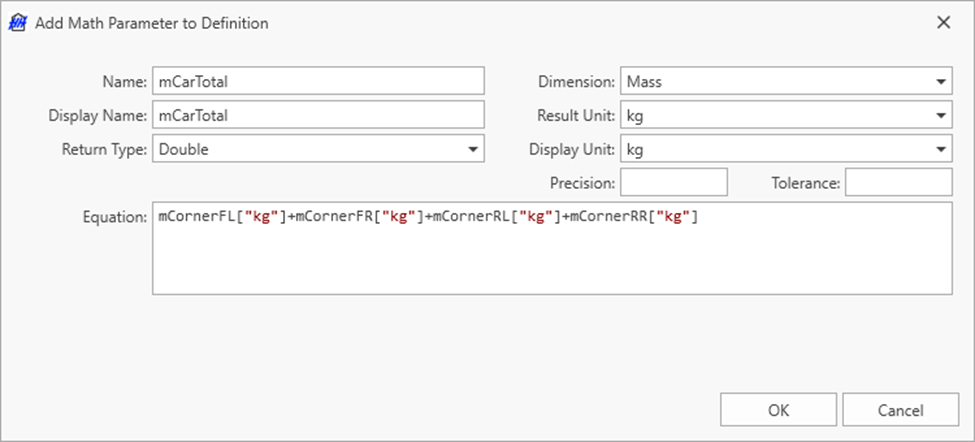
More information regarding the available functions for math parameters can be found in the math expression reference section.
Creating a part and adding a part parameter
In this section we will create parts for front and rear springs and then add parameters to the setup definition to reference these parameters.
Creating all the parts
Open the parts view

Add a part category for the front spring
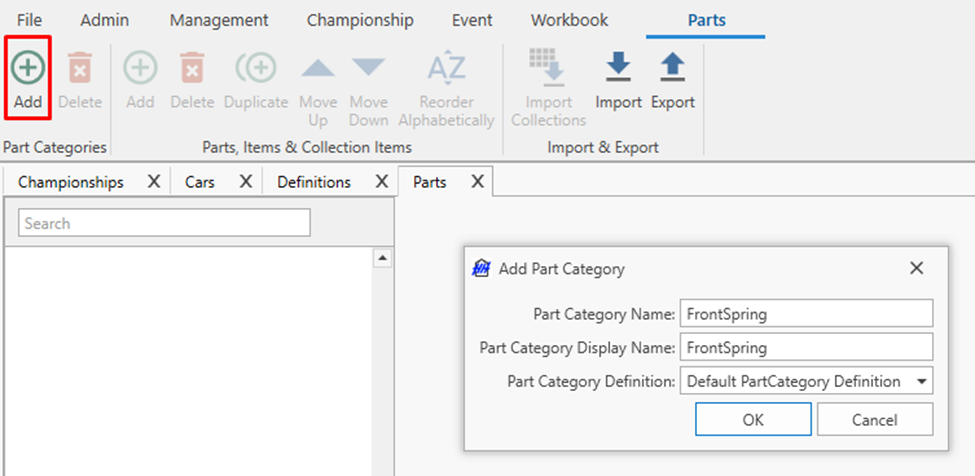
You can then add the rear spring and all parts and part items. You might end up with a part library like this:
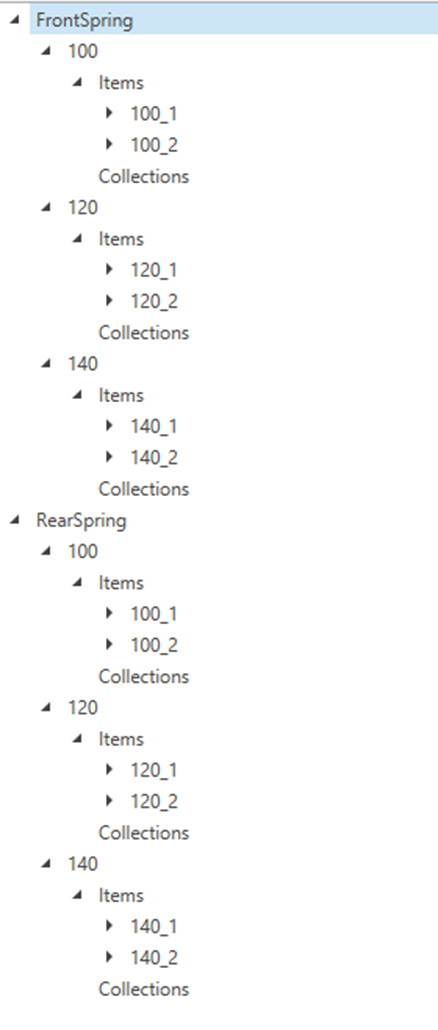
To summarize:
- The part category (front or rear spring) refers to the type of part
- The part (100, 120, 140) refers to the specification of the part
- The part item (100_1, 100_2) refers to a physical part that exists in your inventory. Selecting which part items are on your car for a given run allows you to track part mileages.
Customizing the parts
Like with the setup definition created previous, each part also has a definition that is created automatically when the part category is created and can be customized to store any required information. Using the example of springs even though the name is the rate, you might also want to add a numerical parameter to the part to store the rate. You might also want to store the rate of each spring part item if you measure them independently.
Go back into the definitions page and select the automatically created FrontSpring part definition
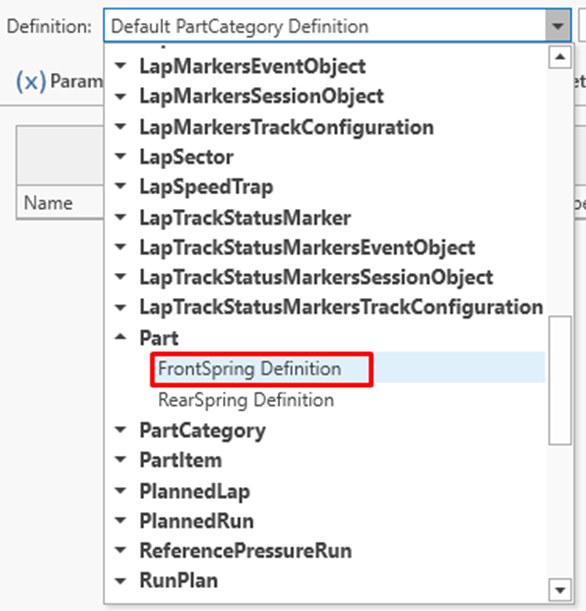
And you can add a parameter to the definition for the rate of the spring

The same can be done for the RearSpring part definition, the FrontSpring/RearSpring part item definitions.
Now if you go back into the parts view you can see the parameters appear and you can define their values


You may also want to add other parameters like the weight for each spring.
Referencing these parts in the setup
Now going back to the setup definition, you can add part parameters to allow you to reference the parts that were just created.
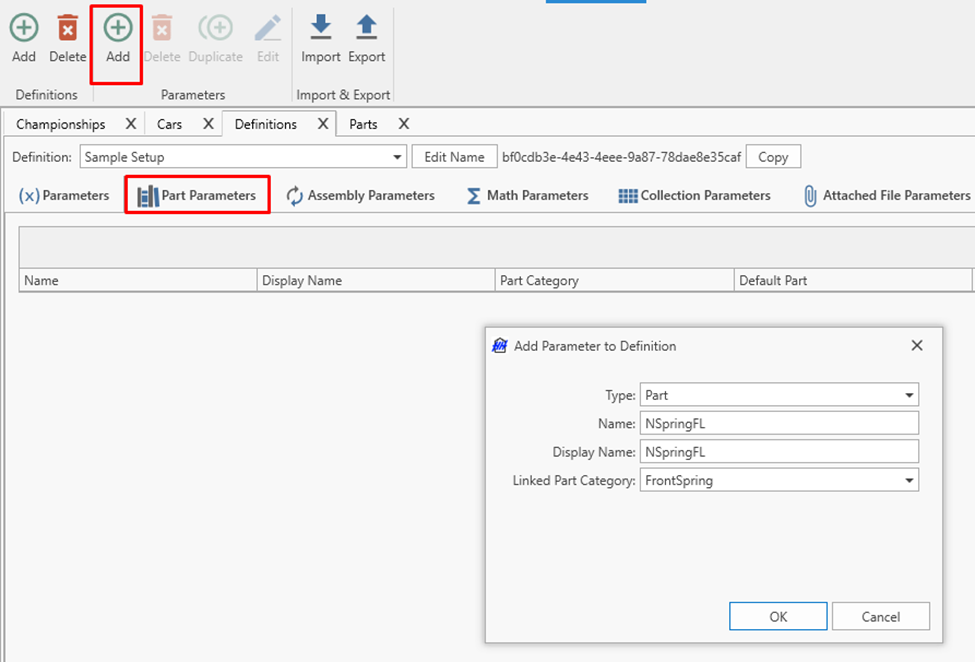
You can create a part parameter for each corner of the car
Referencing part parameters in math parameters
The parts parameters that are in the setup definition can be referenced in math parameters to implement user-defined logic. As an example, you could create a math parameter that calculates the average spring rate of the two front spring part items.
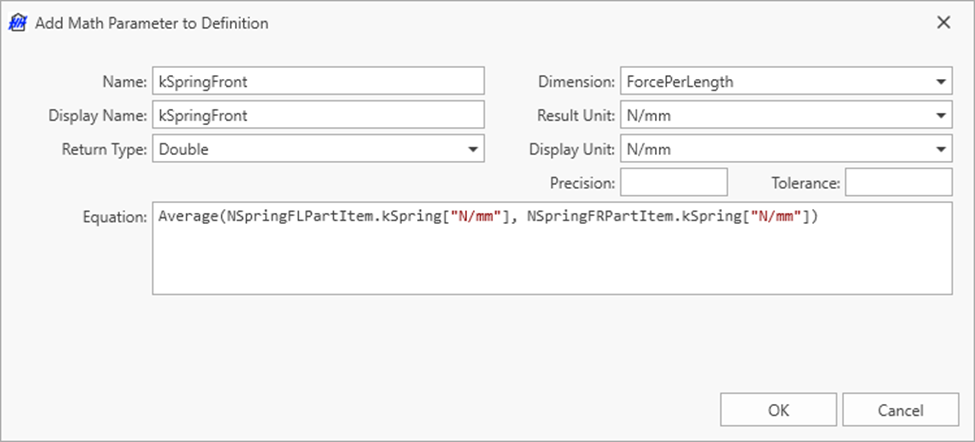
Customizing the setup sheet
The next step is to define the user interface of the setup sheet. This can be done by opening the CID Definition editor (CID = Column Item Display).

Select the setup definition and click Add New to add a new CID. It should be called Default to make sure it shows up properly in the setups view.

You can now define the UI of the setup sheet. Start by creating dragging a section onto the screen then add a block and line. Then you can drag in a Parameter Textbox.


Select the Parameter Textbox and in the properties section at the bottom of the screen select the parameter to be the mCornerFL
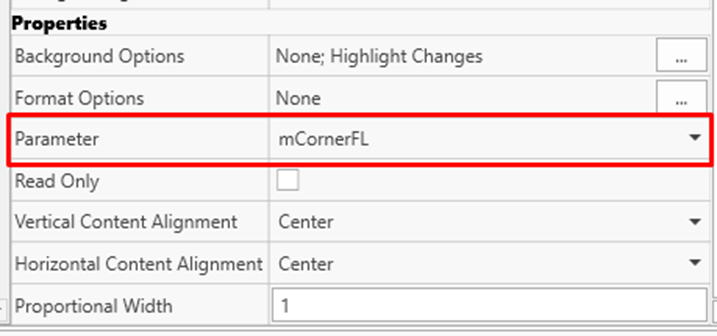
Press save on the ribbon bar and you will see a preview of the setup sheet

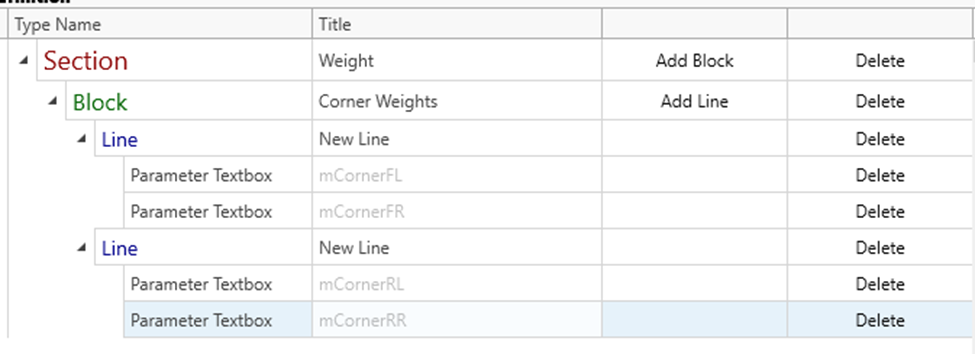
You can rename the Section and Block to give more meaningful titles and press save again

Add another line and three more Parameter Textboxes and click save and you have the data entry field for the four corner weights

Now add another Block and Line and drag in a Math Parameter Display and this will be used to show the total weight math parameter.
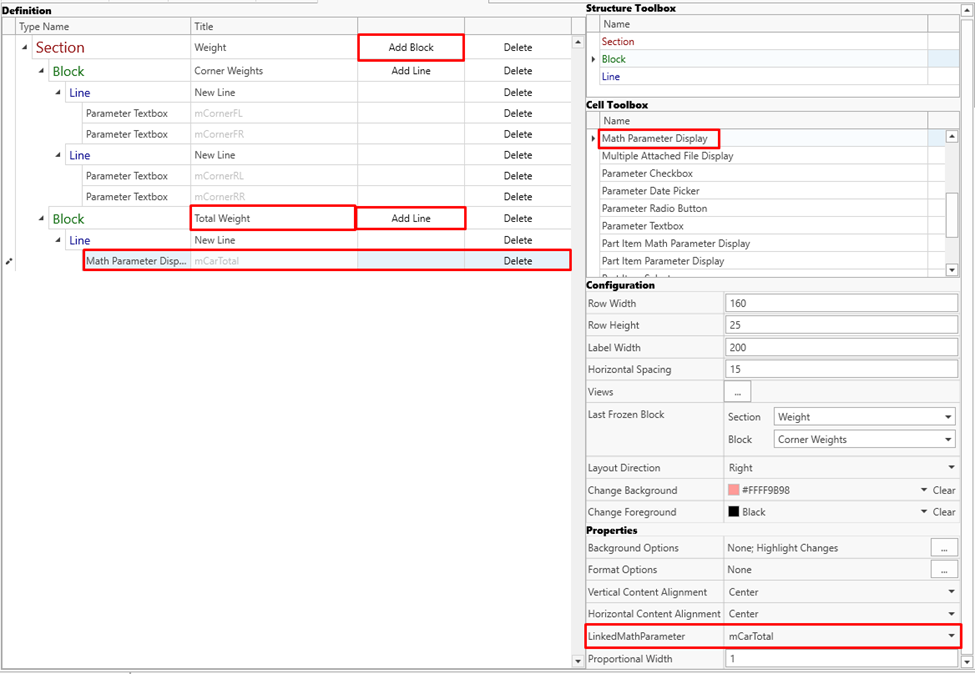
After pressing Save you can enter some test data in the preview area to make sure the math parameter is calculated correctly.

Now to show the springs create another section and add 4 Part Item Selectors
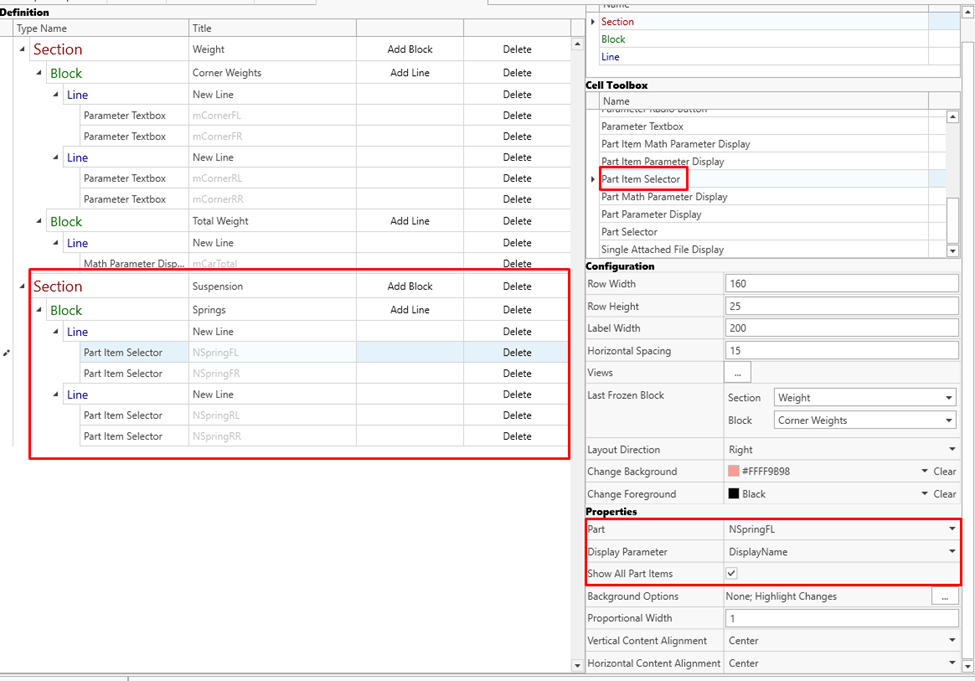
After pressing Save you can see the selectors for the four springs
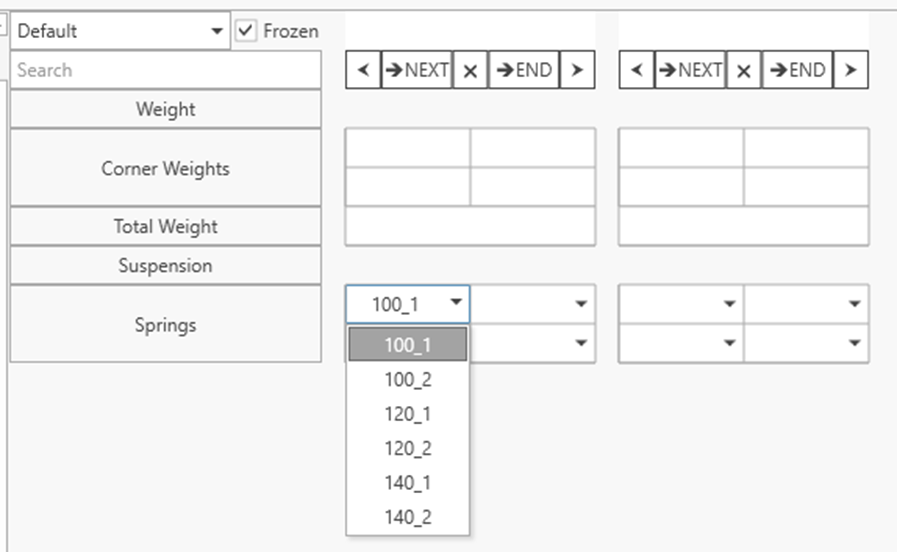
Creating Event Data
To be able to define event data you need to define stuff like the championship, your cars, the event etc. These entities are explained in detail in the Management Entities section of this online documentation You should define at least:
- Track
- Championship
- Car
- Tyre Specifications
- Drivers
Defining an Event
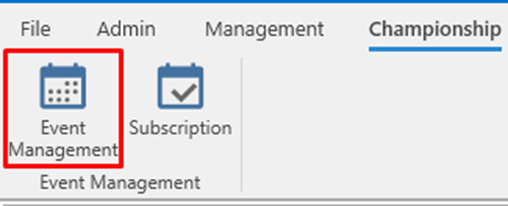
The event can be defined in the Event Management part of the software that is described in the online documentation
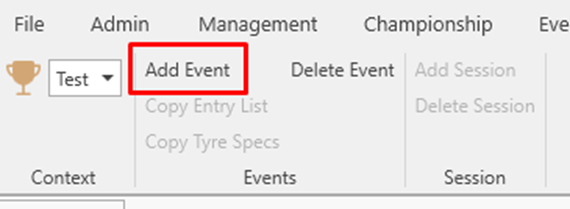
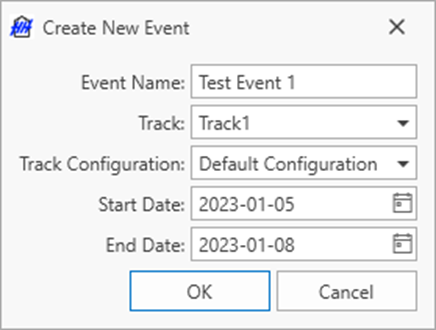
You can then add cars and sessions to the event.

Subscribing to an Event
To view and edit the data for an event you must subscribe to the event. This downloads the event data onto your computer.
Subscribe to the test event that was created in the previous step. Once the data is downloaded the subscription status indication will turn green.

Testing the setup sheet
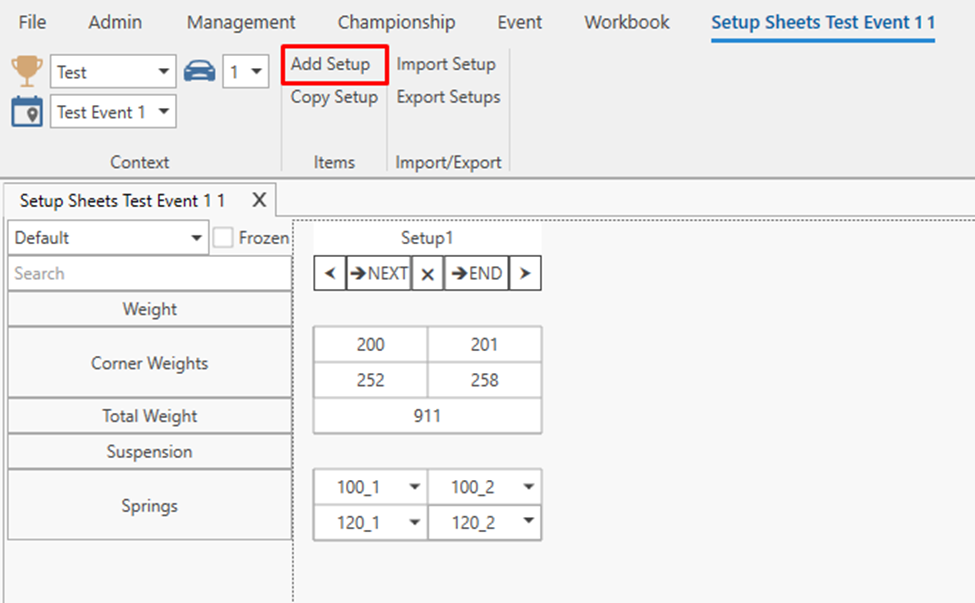
Adding a setup
Open the setup sheet

Press Add Setup
Copy setup parameters
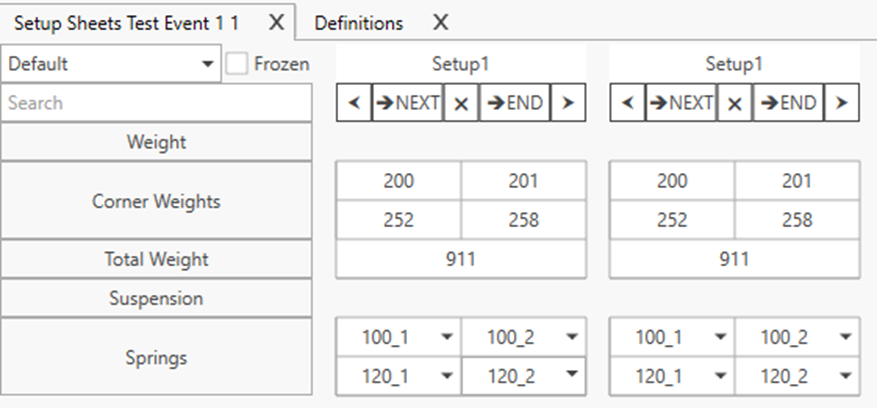
The →NEXT button copies the setup beside the current one. By default, it will not copy any of the parameters. You can configure which parameter values will be copied to a new setup in the definitions window:

Select Copy To New for all parameters and then test the →NEXT button:
Next Steps
- User management and permissions is handled through the website. You can add users and control their access to data.
- Other event data topics are handled in the event entities
- To get timing data populated from HH Timing you can use the DMI
- The Web API can be used to extend the functionality of the software. Or you can write your own plugin to customize the HH Data Management client