Introduction to Python
This tutorial is an introduction to installation and development in Python. For specific information on the hhdm-apiclient-wrapper package, please see Python wrapper.
1. Installation
Nowadays, many Linux and UNIX operating systems include Python pre-installed. On Windows, Python can be installed by downloading and installing the latest version on python.org/downloads.
The hhdm-apiclient-wrapper requires at least Python version 3.10 or higher. This can be verified by running python --version in the same environment you will be running your python script. You can also check the Python version being used in a script:
import sys
print(sys.version)
Python comes with a package manager known as the "Python Package Index" (or PyPi). This is generally how external packages are added and managed. A tutorial for using PyPi can be found here. PyPi should be installed automatically along with Python, but it is a good idea to verify the version of PyPi you are using is linked to the version of Python you are running your scripts with, otherwise installing a package with PyPi may not make it available within Python and lead to confusing errors. To do this, run:
python -m ensurepip --default-pip
The directory listed by the output of the above command should match the output of where python on Windows (or which python on Unix/macOS).
To avoid this concern entirely, pip can also be run directly from the python interpreter like so:
python -m pip
The hhdm-apiclient-wrapper can now be installed with pip install hhdm-apiclient-wrapper.
2. IDEs and editors
There are many IDEs that can be used to develop in Python. PyCharm is a commonly used one that has a free Community edition and many features like quick code navigation, code completion, refactoring, and a debugger.
IDEs like PyCharm are a good idea for developing larger projects, however if writing a single script or something small, a text editor or notebook is another choice. Sublime Text is a common option, and Visual Studio Code walks the line between text editor and IDE very well. Both of these options have large plugin marketplaces with well established extensions for Python.
Jupyter Notebook is another option to develop in Python. This can be installed via PyPi pip install jupyterlab (Note: this may be required to run in a terminal with Administrator priviledges). And launched via the command jupyter lab.
Documentation for Jupyter can be found on their documentation page.
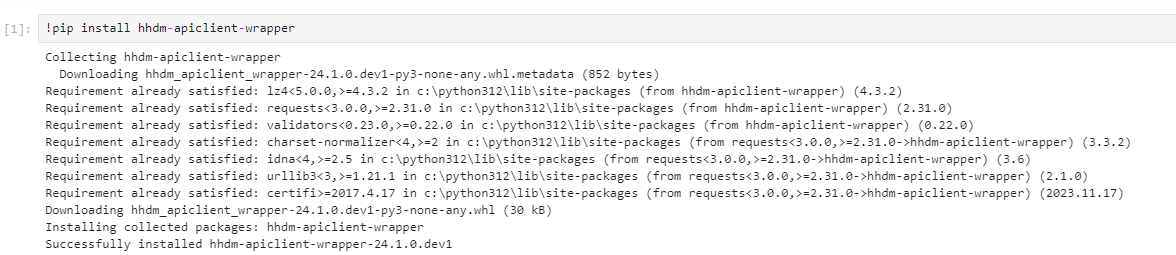
To install the hhdm-apiclient-wrapper in a Jupyter Notebook enter !pip install hhdm-apiclient-wrapper in a code cell and run it. It should look something like this:
3. Asynchronous programming
Python has the same async/await syntax that most modern programming languages do. All endpoint functions within the hhdm-apiclient-wrapper use this feature and must be awaited. However, the default Python interpreter operates in a synchronous context so these functions cannot be called in a global context as you would normally. The solution for this is to use the package asyncio (pip install asyncio). This allows asynchronous functions to be called synchronously like the following:
async_result = asyncio.run(async_function())
This also means the recommended way to setup an asynchronous python script that will be run from a synchronous context is as follows:
import asyncio

async def main():
  # Your code here
  # await async_function()
  pass

if __name__ == '__main__':
  asyncio.run(main())
Thus, code in main() can use async/await as normal and the only place asyncio is used is to call this function, avoiding accidentally nesting calls to asyncio.run(), which will error.
if __name__ == '__main__' is a convention for safety so that main() is never run unless the containing file is run as a script (i.e. if this file is imported to another, the __name__ variable will be set by Python to not be equal to '__main__' so main() will not be executed).
Some Python environments do default to an asynchronous context (like Jupyter Notebook) which means asyncio is not required and asynchronous functions can be awaited in the global context.
Examples using asynchronous programming and the hhdm-apiclient-wrapper can be found on our Github.
4. Virtual environments
A virtual environment, or venv is the ubiquitous system by which Python manages dependencies. It scopes dependencies such that the dependencies of different projects do not interfere with each other. Python recommends to always install packages to a venv instead of globally to avoid potential conflicts. Packages that also function as a CLI application should be installed with pipx so they can still be used globally.
The command python -m venv venv creates a venv in the current directory and saves the configuration to .\venv. The venv is activated by running venv\Scripts\activate. When the venv is active, packages can be installed using PyPi as normal and they will be automatically isolated to this venv.
If a project is to be shared amongst developers, whenever a new dependency is added, run:
pip freeze > requirements.txt
This writes all installed dependencies and their version to a requirements.txt file. This can be committed to version control and other developers can create their own venv and then run the following to have an identical isolated environment:
pip install -r requirements.txt
venv files should never be committed to version control (i.e. the .\venv directory), the requirements.txt file is all that is needed for other developers to replicate environments.
The Python version used to create the venv should be the only source of error between developers, so it is a good idea to keep it updated. To debug any issues, the file .\venv\pyvenv.cfg contains the Python and virtualenv versions used to create the venv.