Brake Management Introduction
Manage brake sets in HH Data Management using assemblies and the item measurements view. This article explains how to define brake assemblies and record measurements.
Assembly definition
Define the assembly structure based on the specific brake management requirements of the vehicle. Use the table below to determine the necessary assembly configuration:
| Management requirement | Assembly configuration |
|---|---|
| Build sheet selection | Define if front and rear sets are selected simultaneously or independently. This determines if one assembly covers both axles or if separate assemblies are required per axle. |
| Disc and pad pairing | Determine if discs and pads are always paired by axle or side. Create part items for individual components or a single item for the pair accordingly. |
| Disc replacement | Identify if discs are changed as a pair or individually to determine if one or two selections are required. |
| Pad replacement | Determine if pads are changed by corner or axle to set the number of selection points in the assembly. |
| Corner specificity | Determine if discs are corner-specific (e.g., a left disc cannot be used on the right). Create separate part categories for each corner (e.g., "FrontLeftDisc") if parts are unique. Use a general category (e.g., "FrontDiscs") if parts are interchangeable across the axle. |
Example configuration: Front axle
This example demonstrates a front brake set assembly where discs and pads are defined per corner (1 disc and 2 pads per corner). In this setup, discs and pads are interchangeable between the left and right sides.
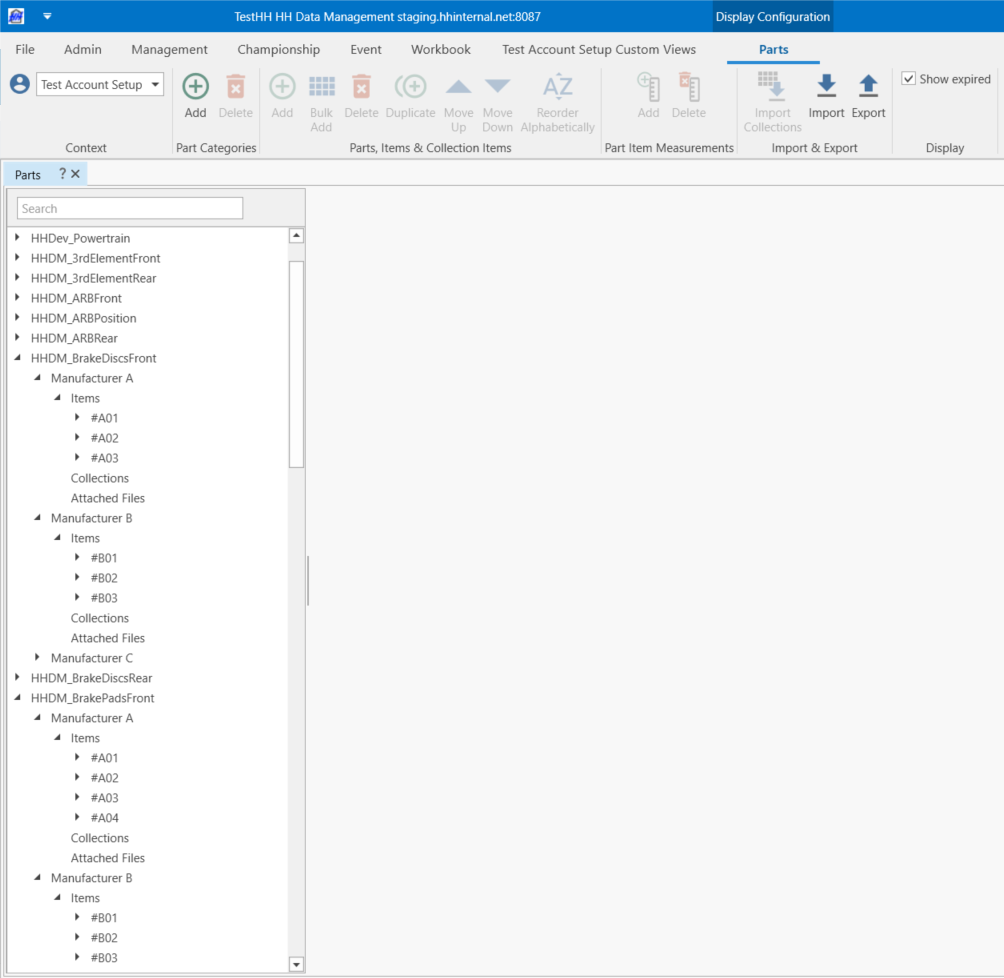
Part categories
Create one part category for:
- Front discs
- Front pads
Add parts (can be one part per specifications) and part items.
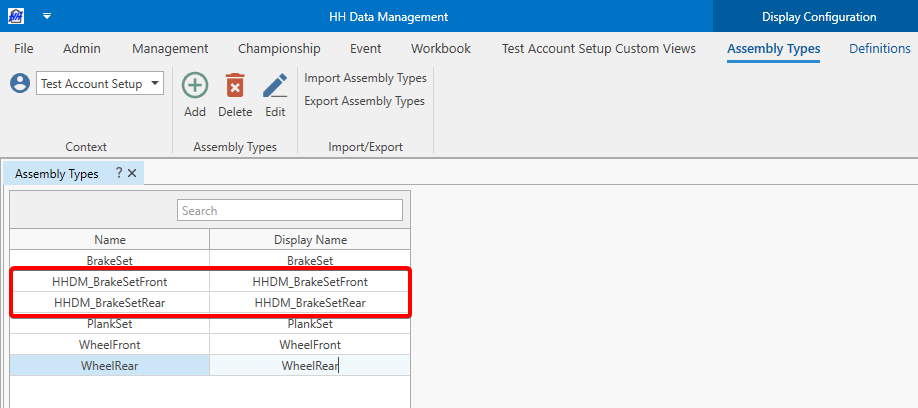
Brake set assembly
-
Create a FrontBrakeSet assembly.
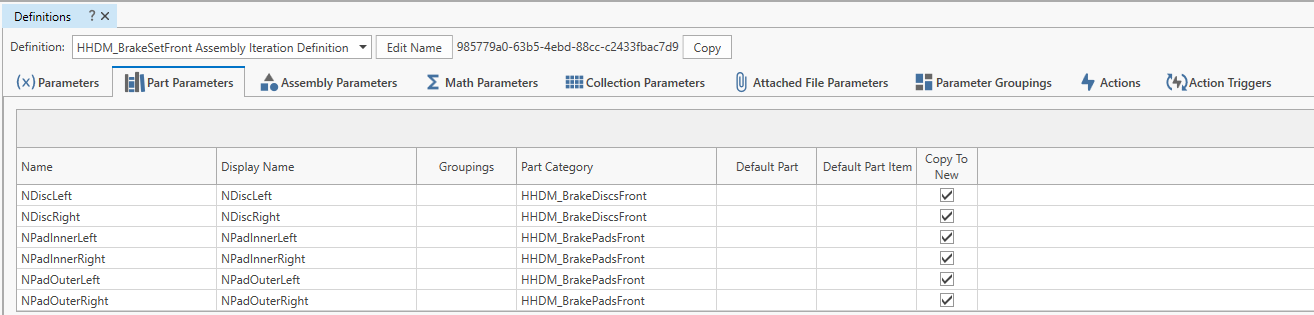
-
Add part parameters to the assembly iteration definition.
-
Add assembly parameter to the Setup definition.

-
Create a front brake set named assembly in the named assembly inventory
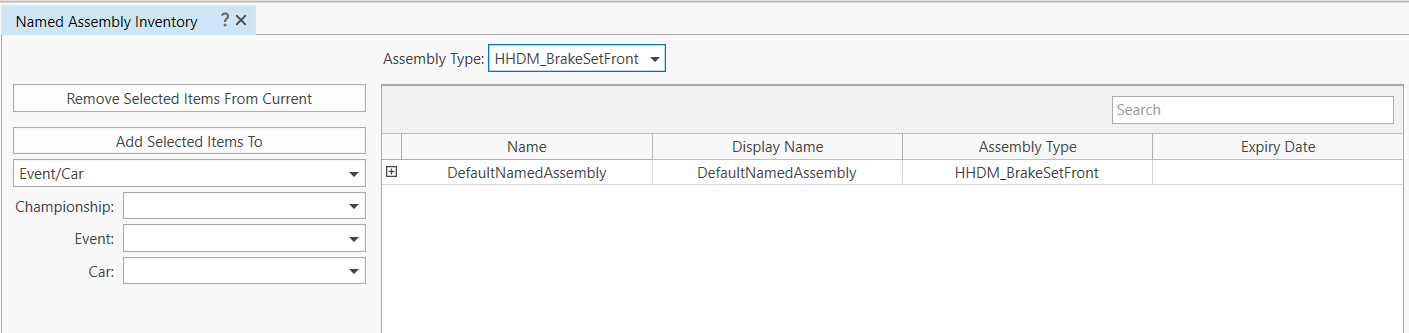
Maintain a consistent brake set name while creating multiple iterations for disc or pad changes by defining several named assemblies.
-
Create the iterations in the assembly iteration inventory

-
Add an assembly iteration selector in the BuildSheet/SetupSheet CID
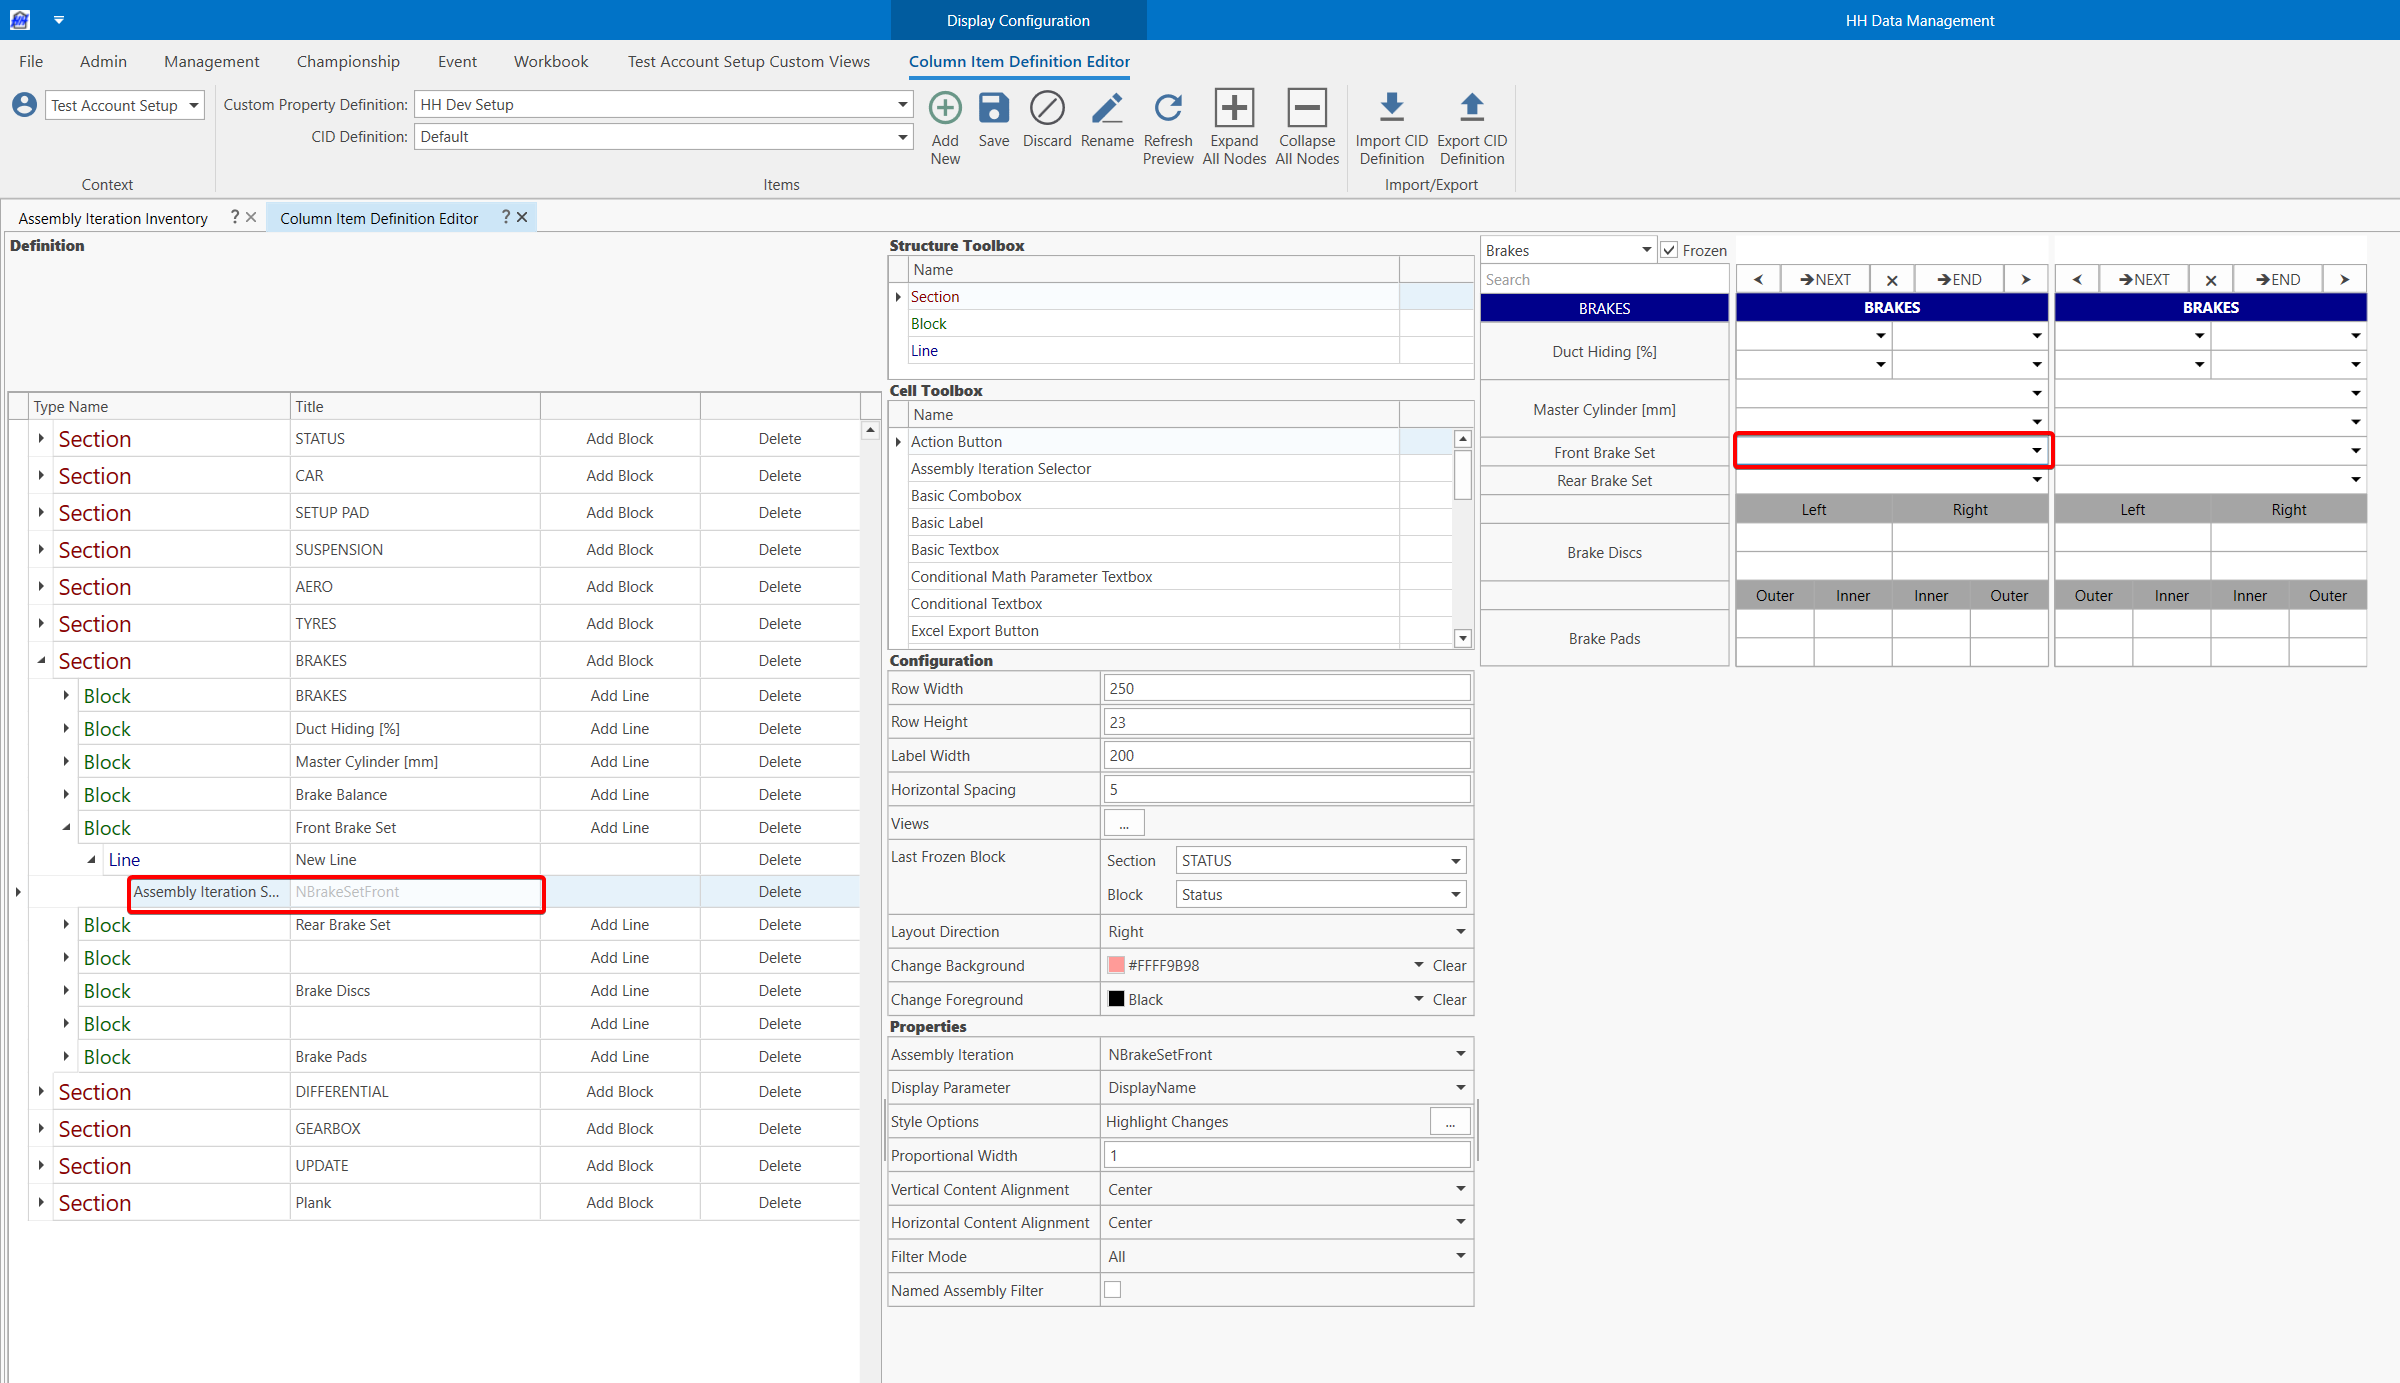
If several named assemblies are used, a named assembly selector can be added in addition to the assembly iteration selector. The last iteration will be automatically selected when the named assembly is selected. The assembly iteration selector can be filtered depending on named assembly selected.
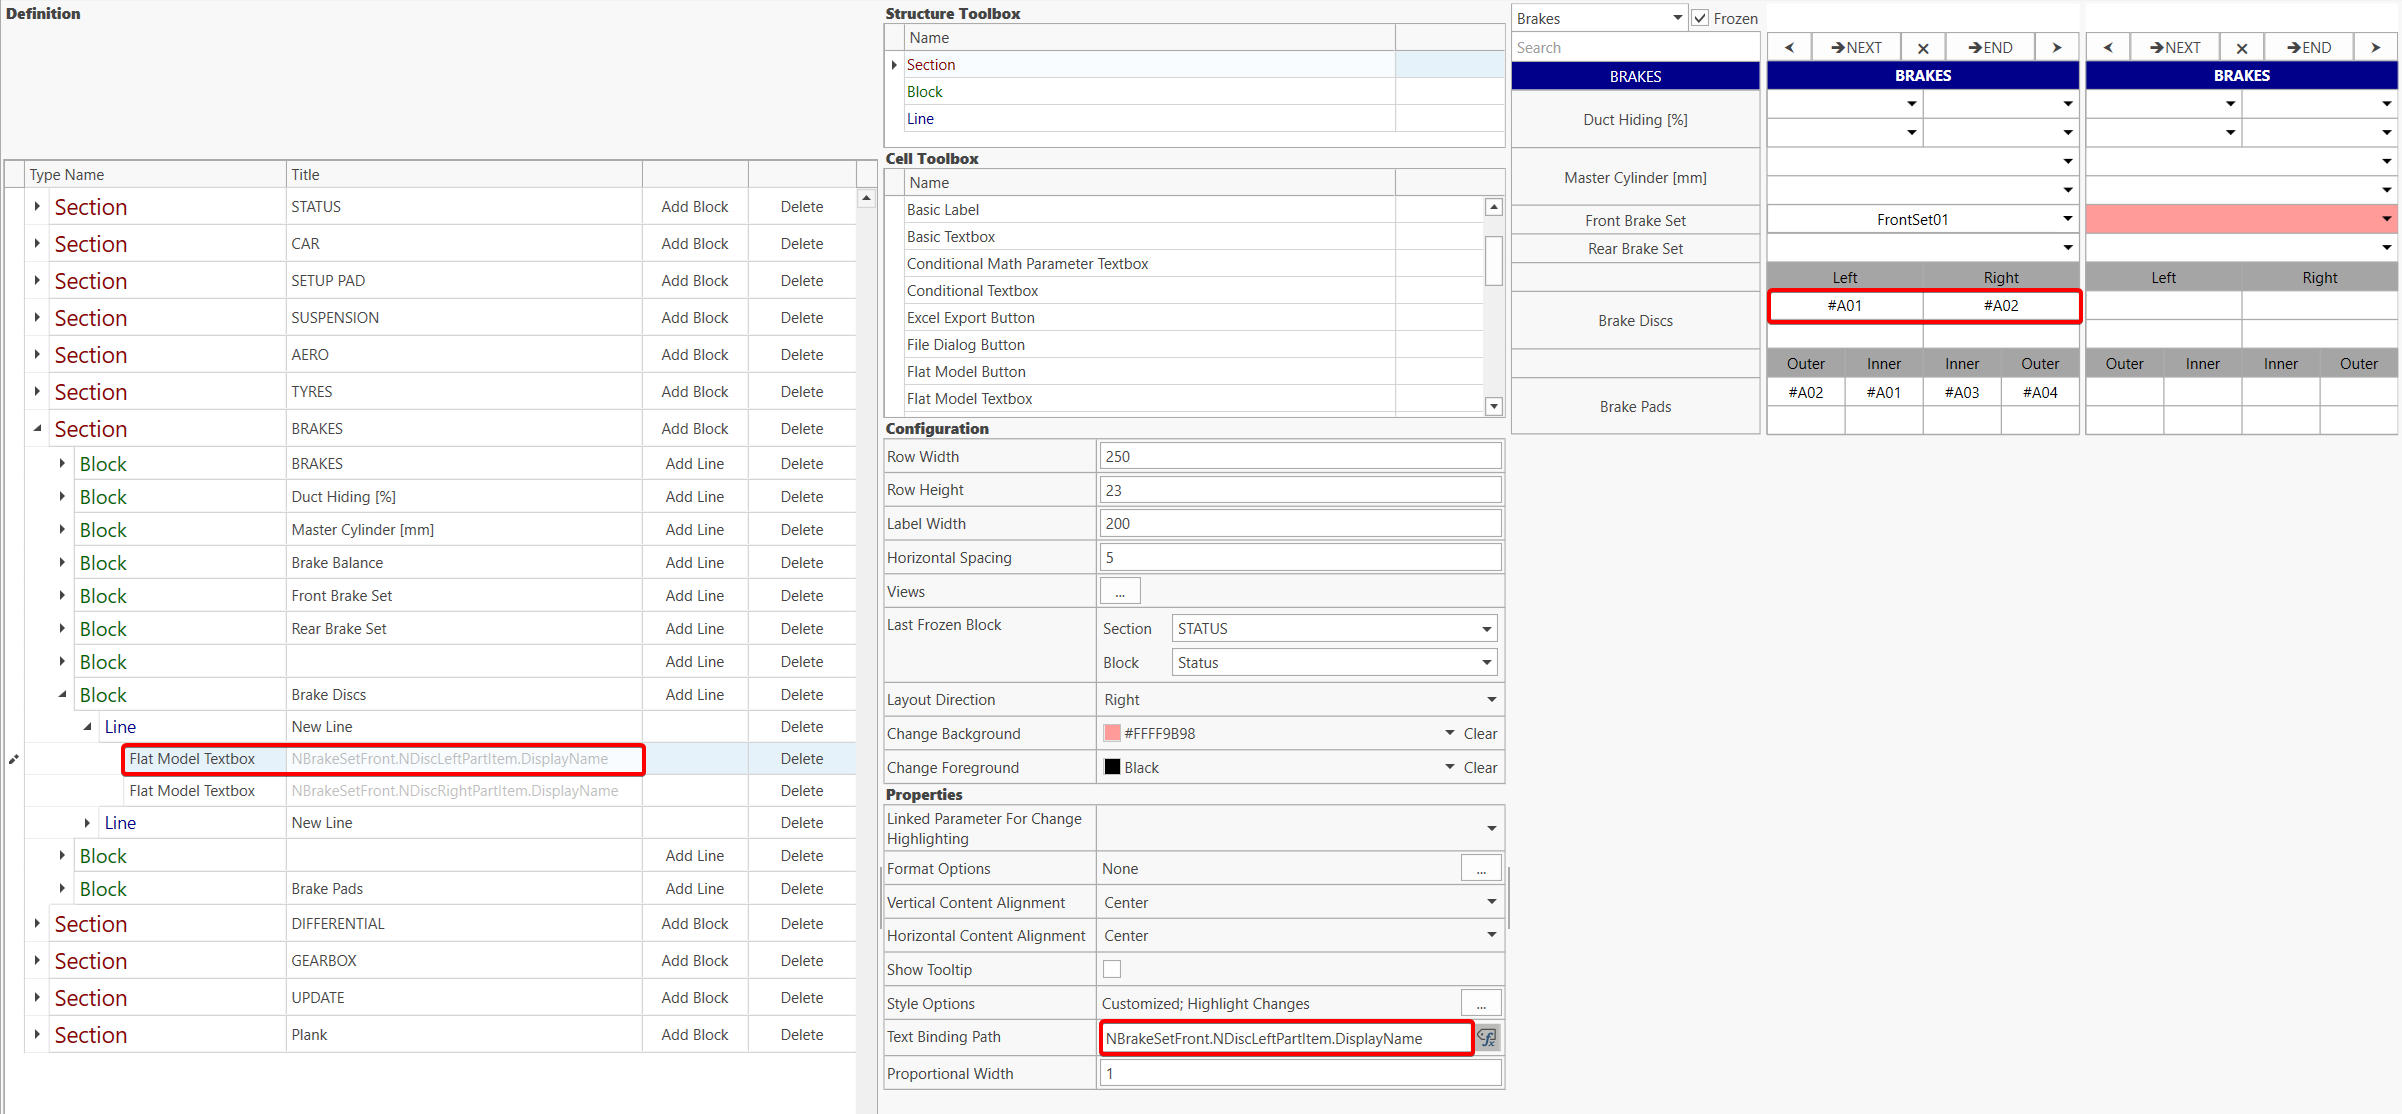
Part items selected in the assembly iteration can be displayed with a flat model textbox using the expression binding path option.
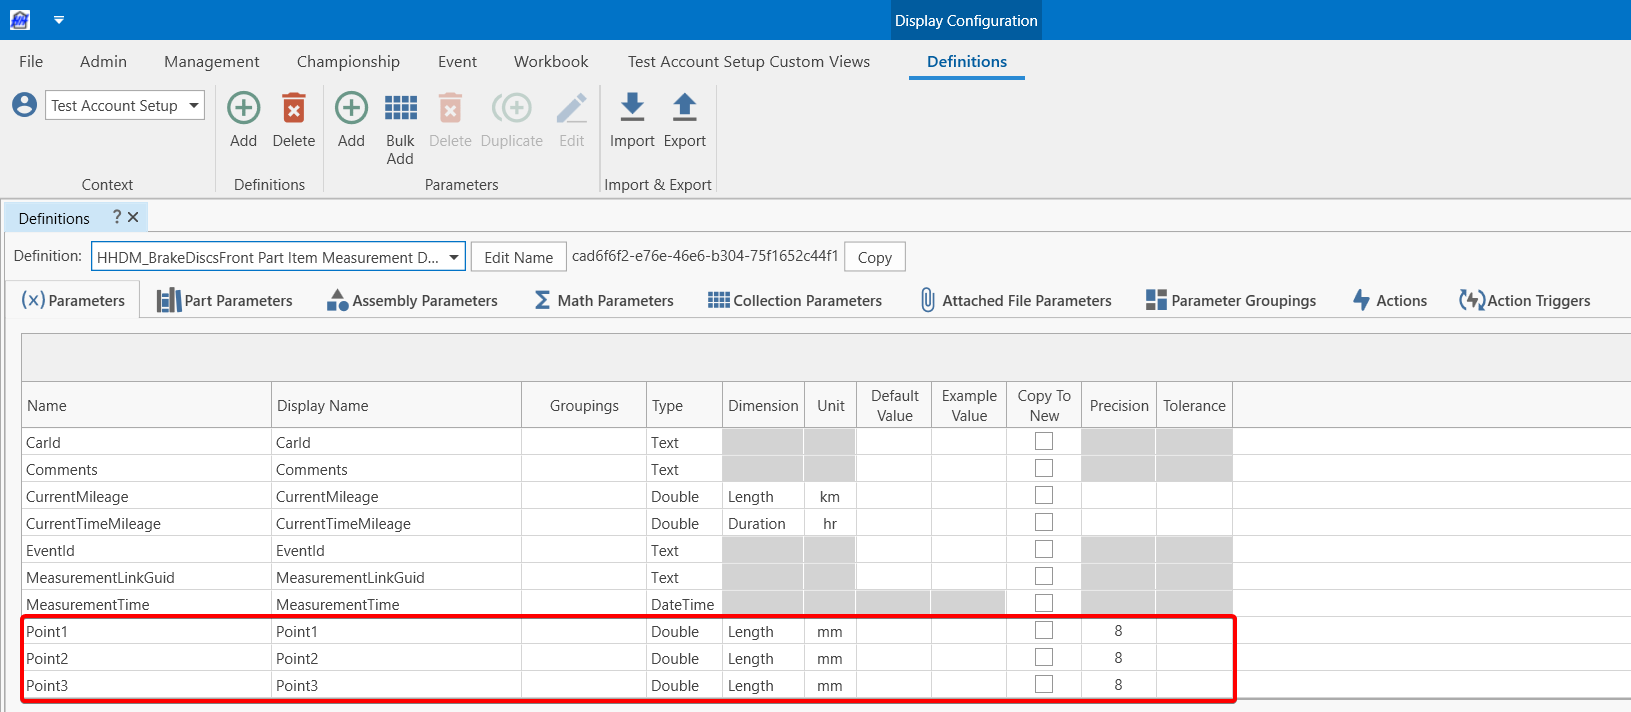
Measurements
Use the item measurement view to define the brake set measurements.
-
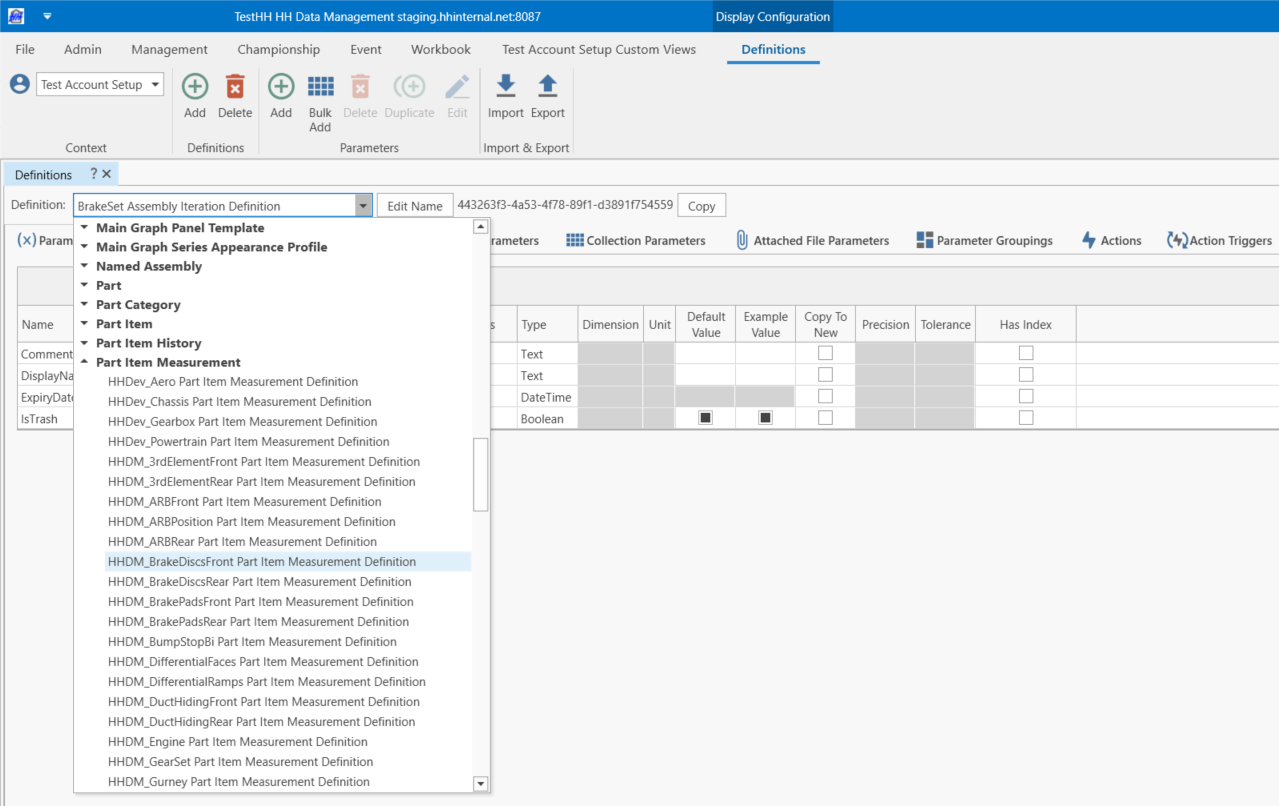
Create the measurement parameters in each part item measurement definitions.
-
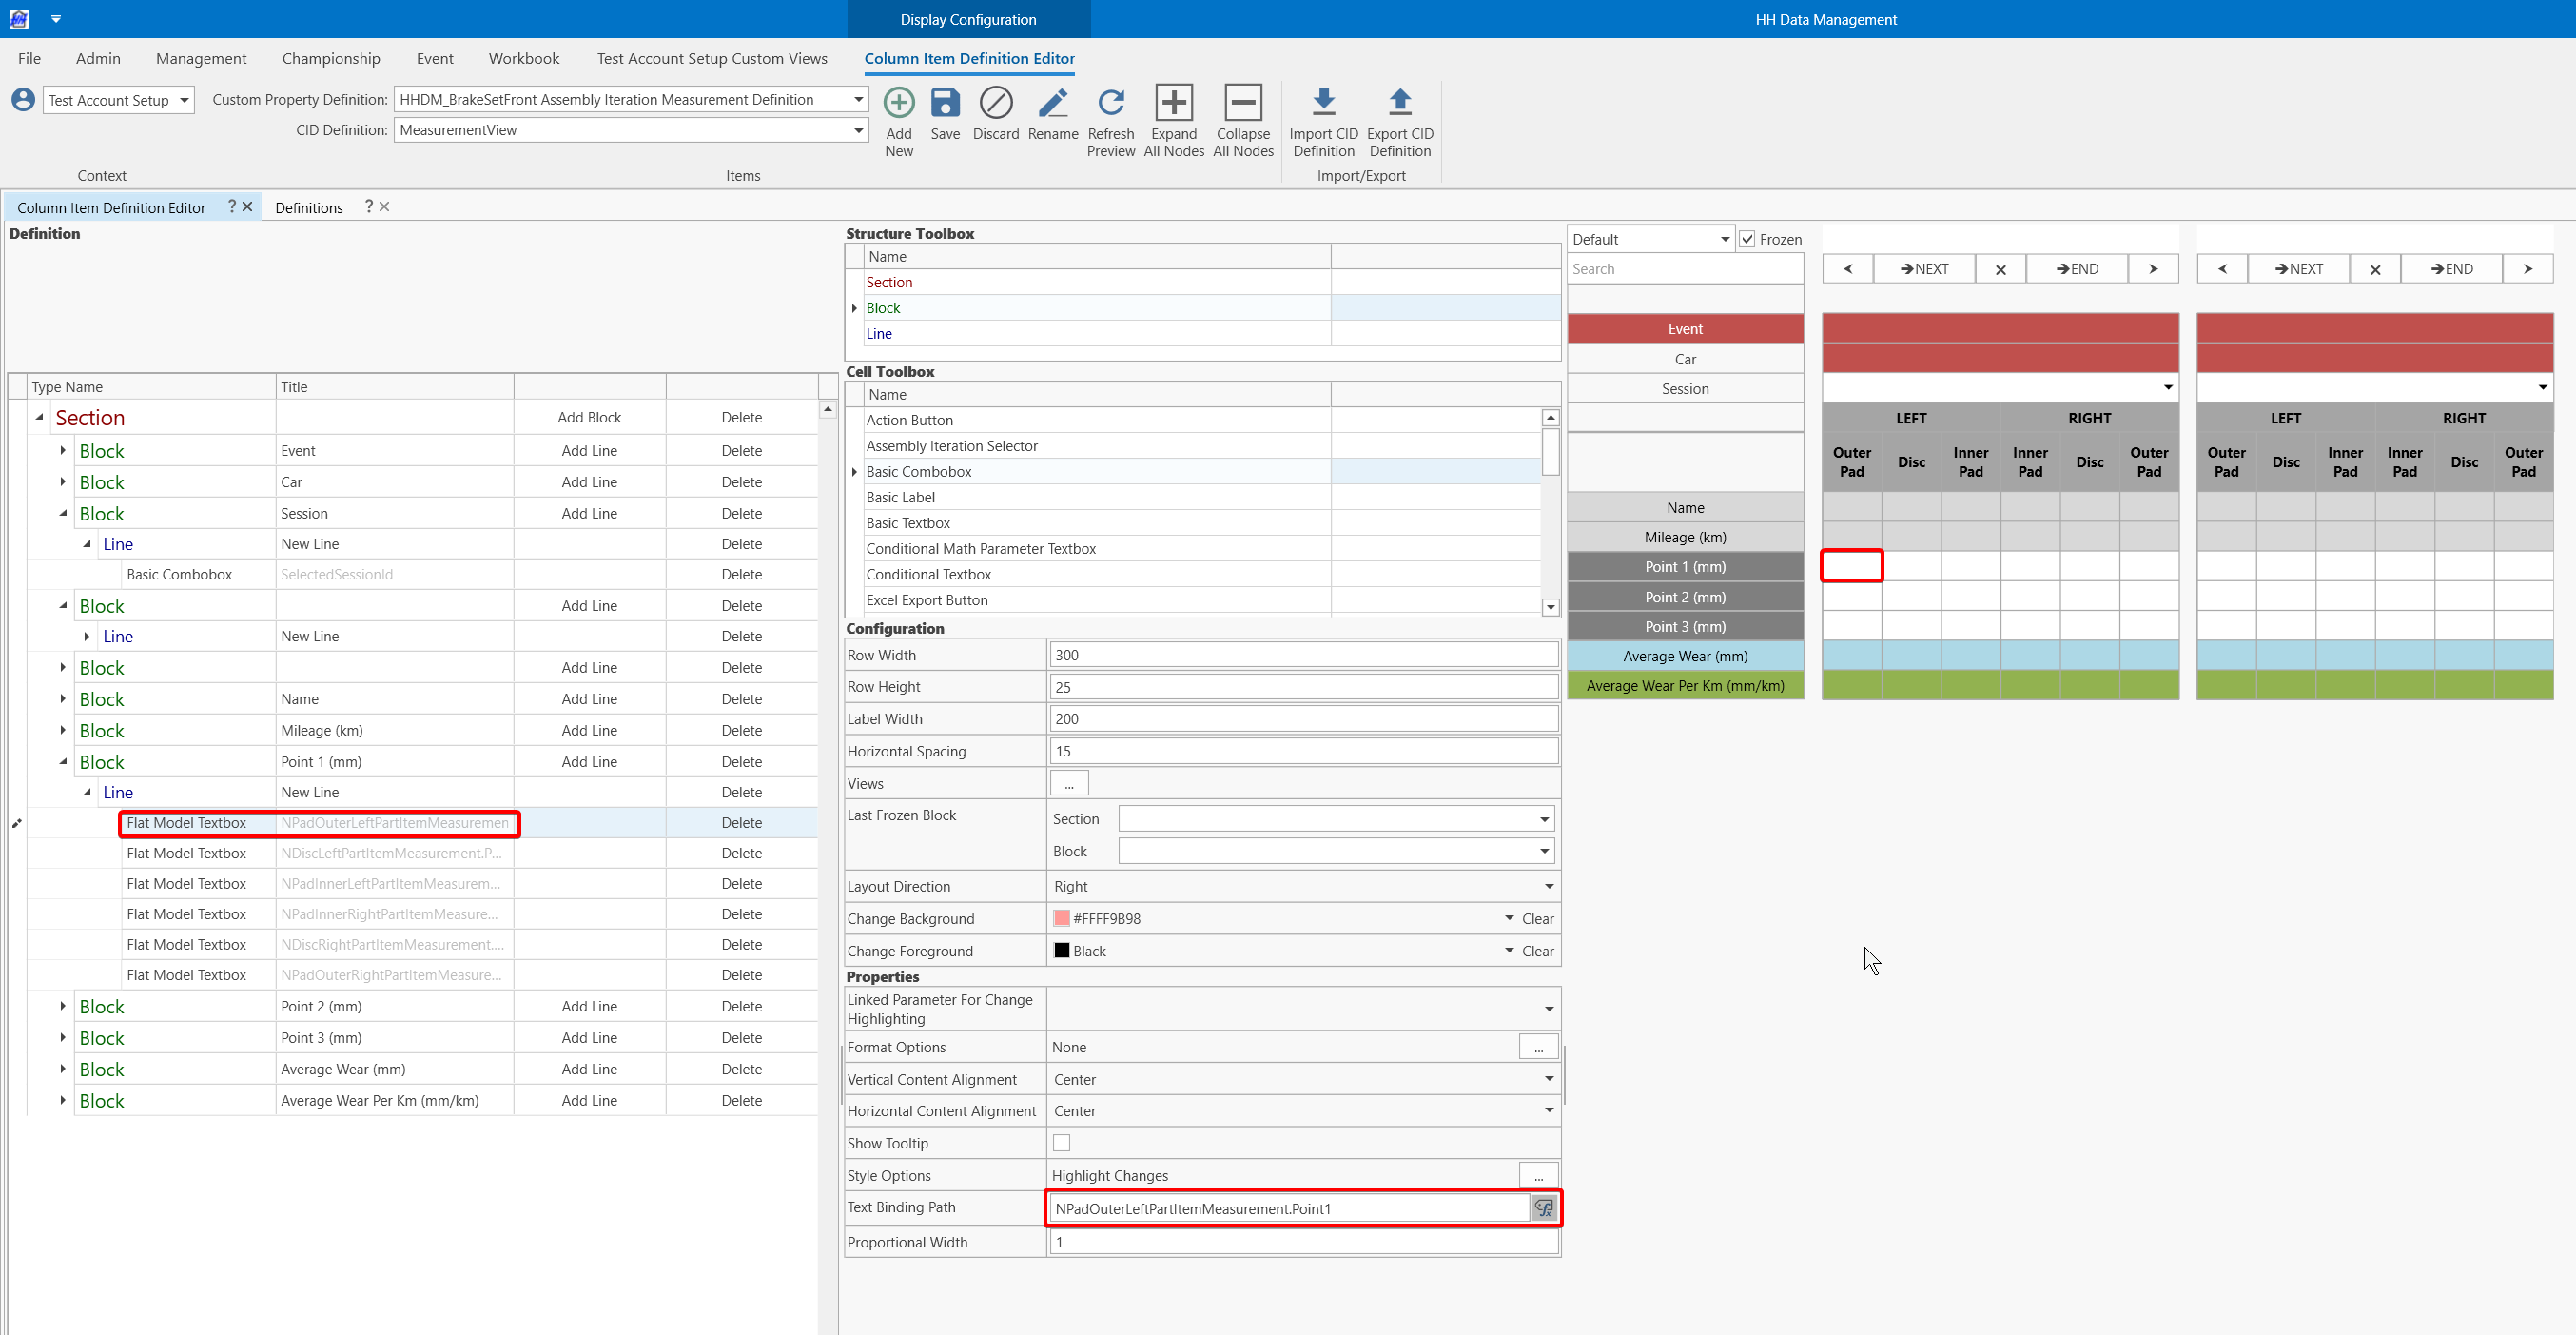
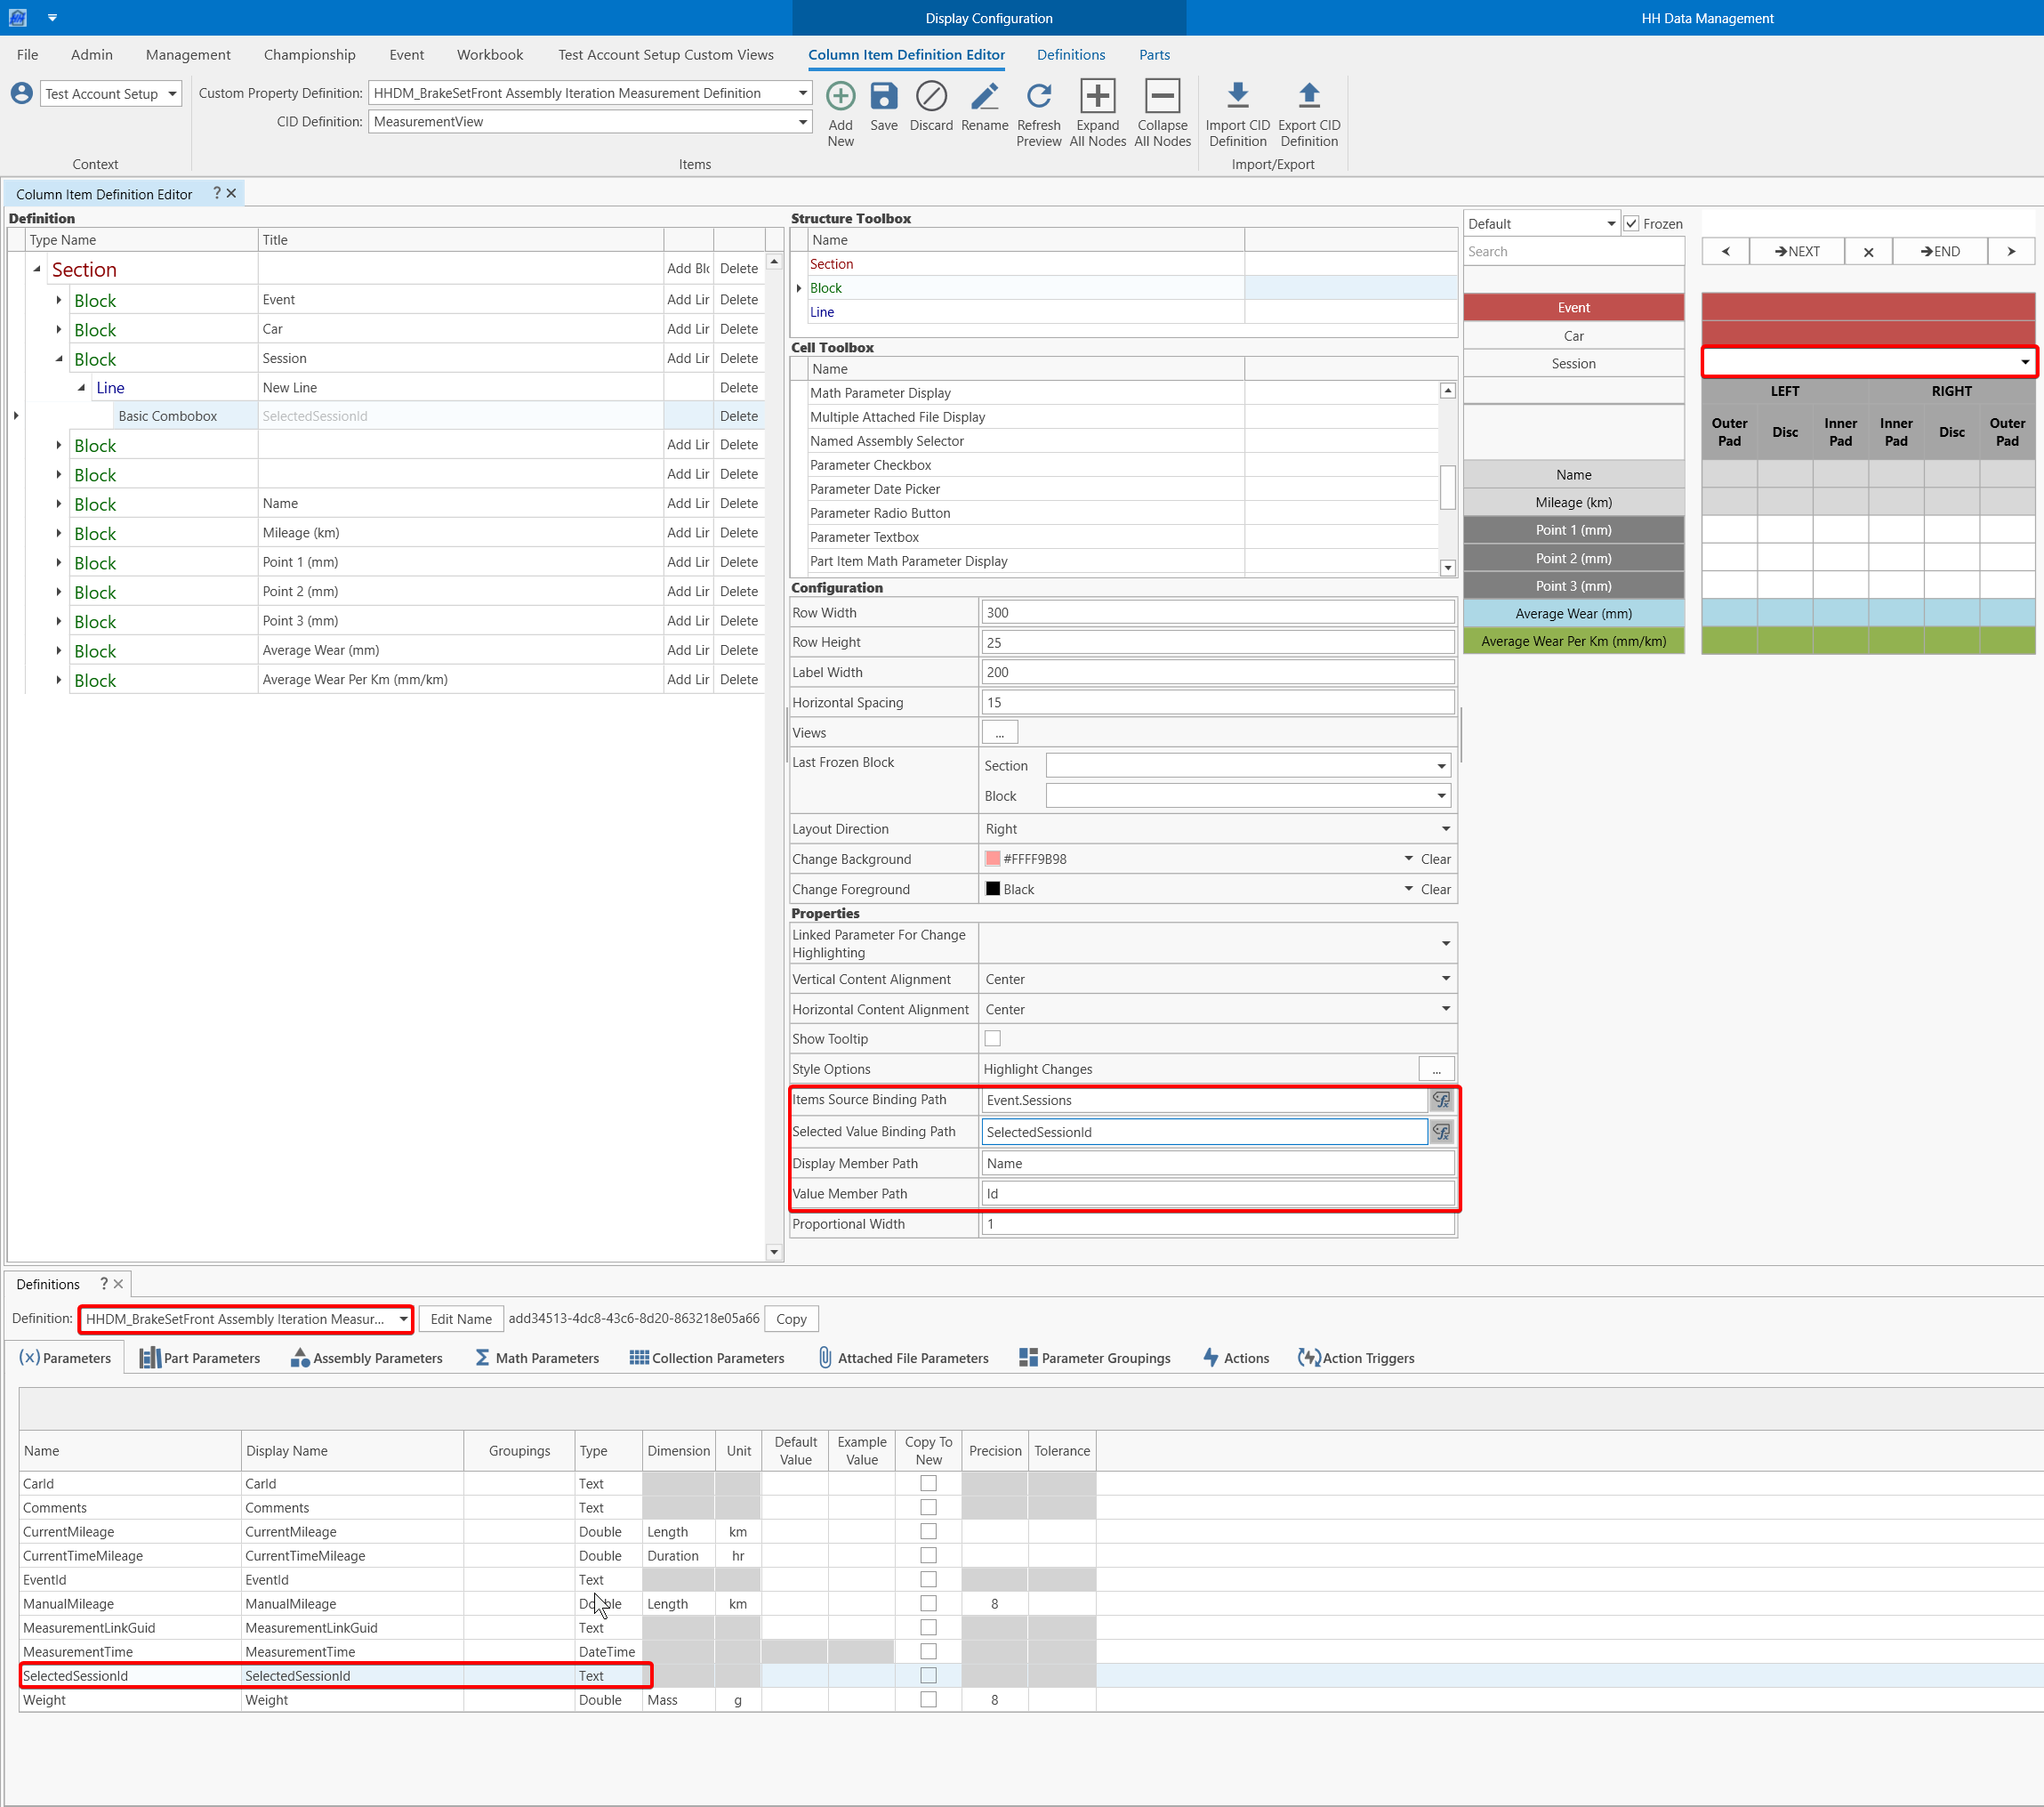
Create a CID named "MeasurementView" in the assembly iteration measurement definition.
-
Link measurement point textboxes to the part item measurements to ensure data saves to the part item. This prevents data from saving to the assembly in cases where a part item is reused in another assembly. Use a flat model textbox to access the measurement.
 Wear can be calculated in the part item measurement definition by comparing with the previous value or with the new value
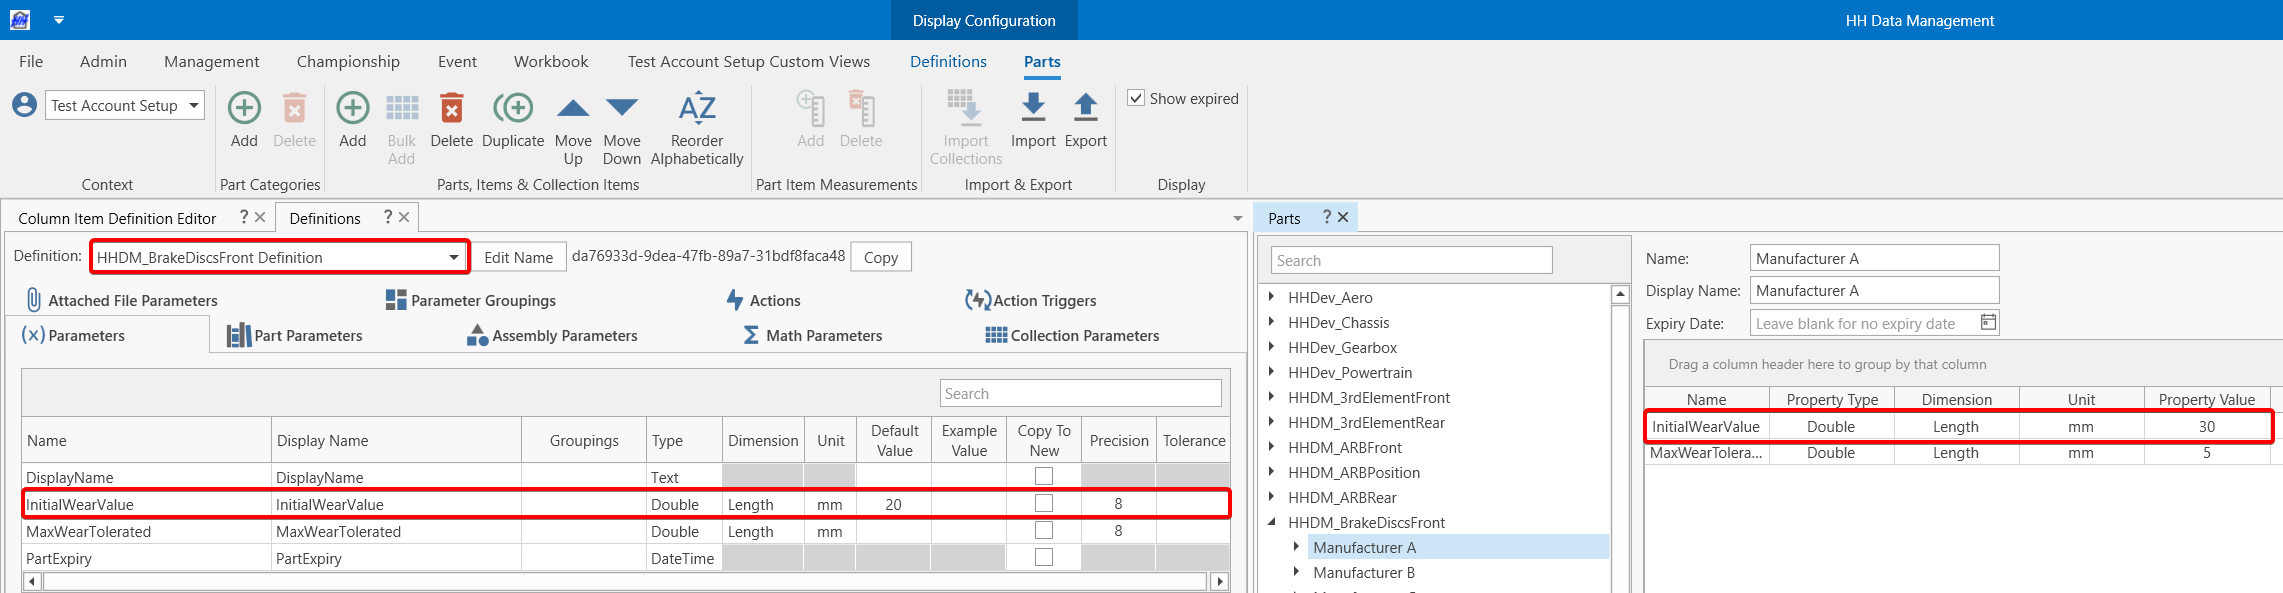
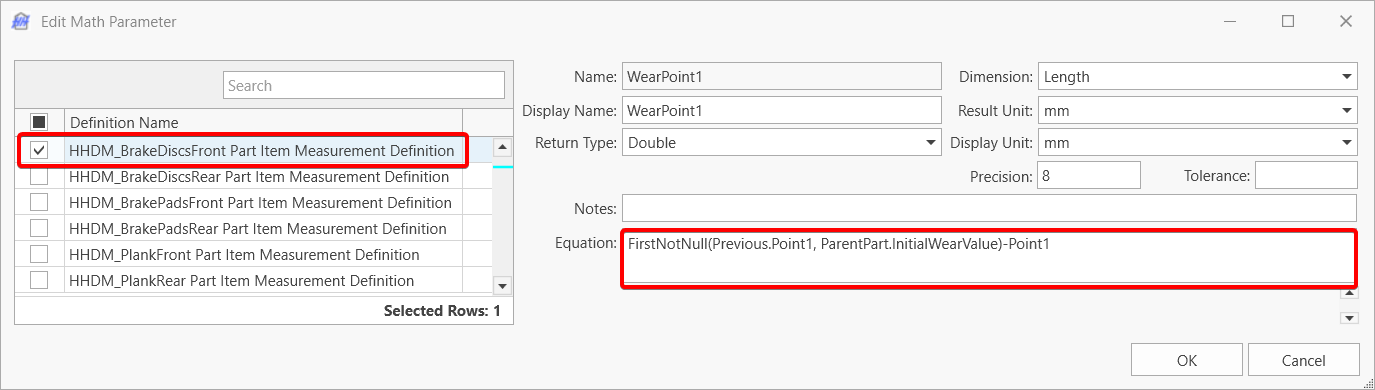 The "InitialWearValue" is created in the part definition.
 Average wear of both discs or 4 pads can be calculated in the assembly iteration measurement definition
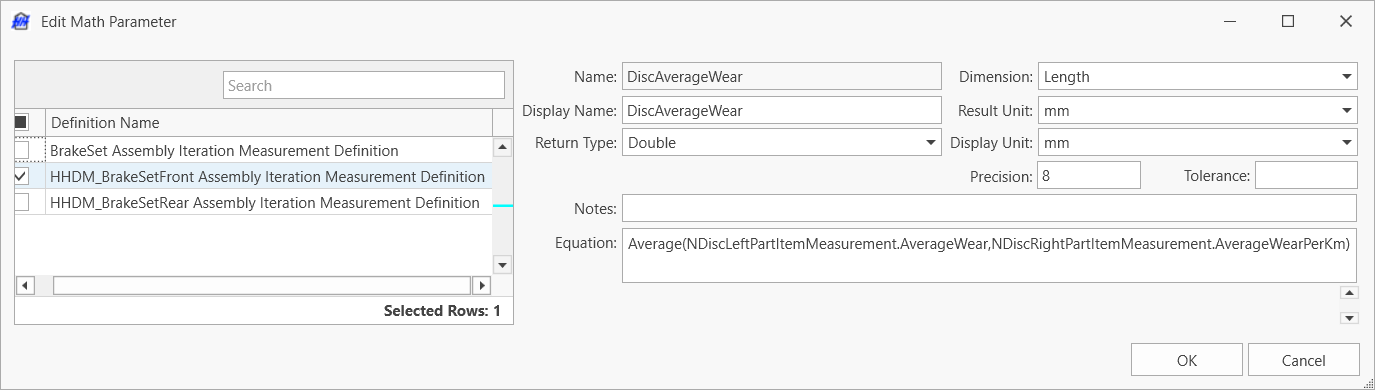
Everything can be displayed in the CID with math parameter display or flat model textboxes
Event Name and Car Number can be automatically filled when creating a measurement with a flat model textbox with the following paths
- Event:
Event.Name - Car:
Car.Number
A manual Session selection can be added with a basic combobox:
- Items Source Binding Path:
Event.Sessions - Selected Value Binding Path:
SelectedSessionId(Note: Add this text parameter to the assembly iteration measurement definition) - Display Member Path:
Name - Value Member Path:
Id
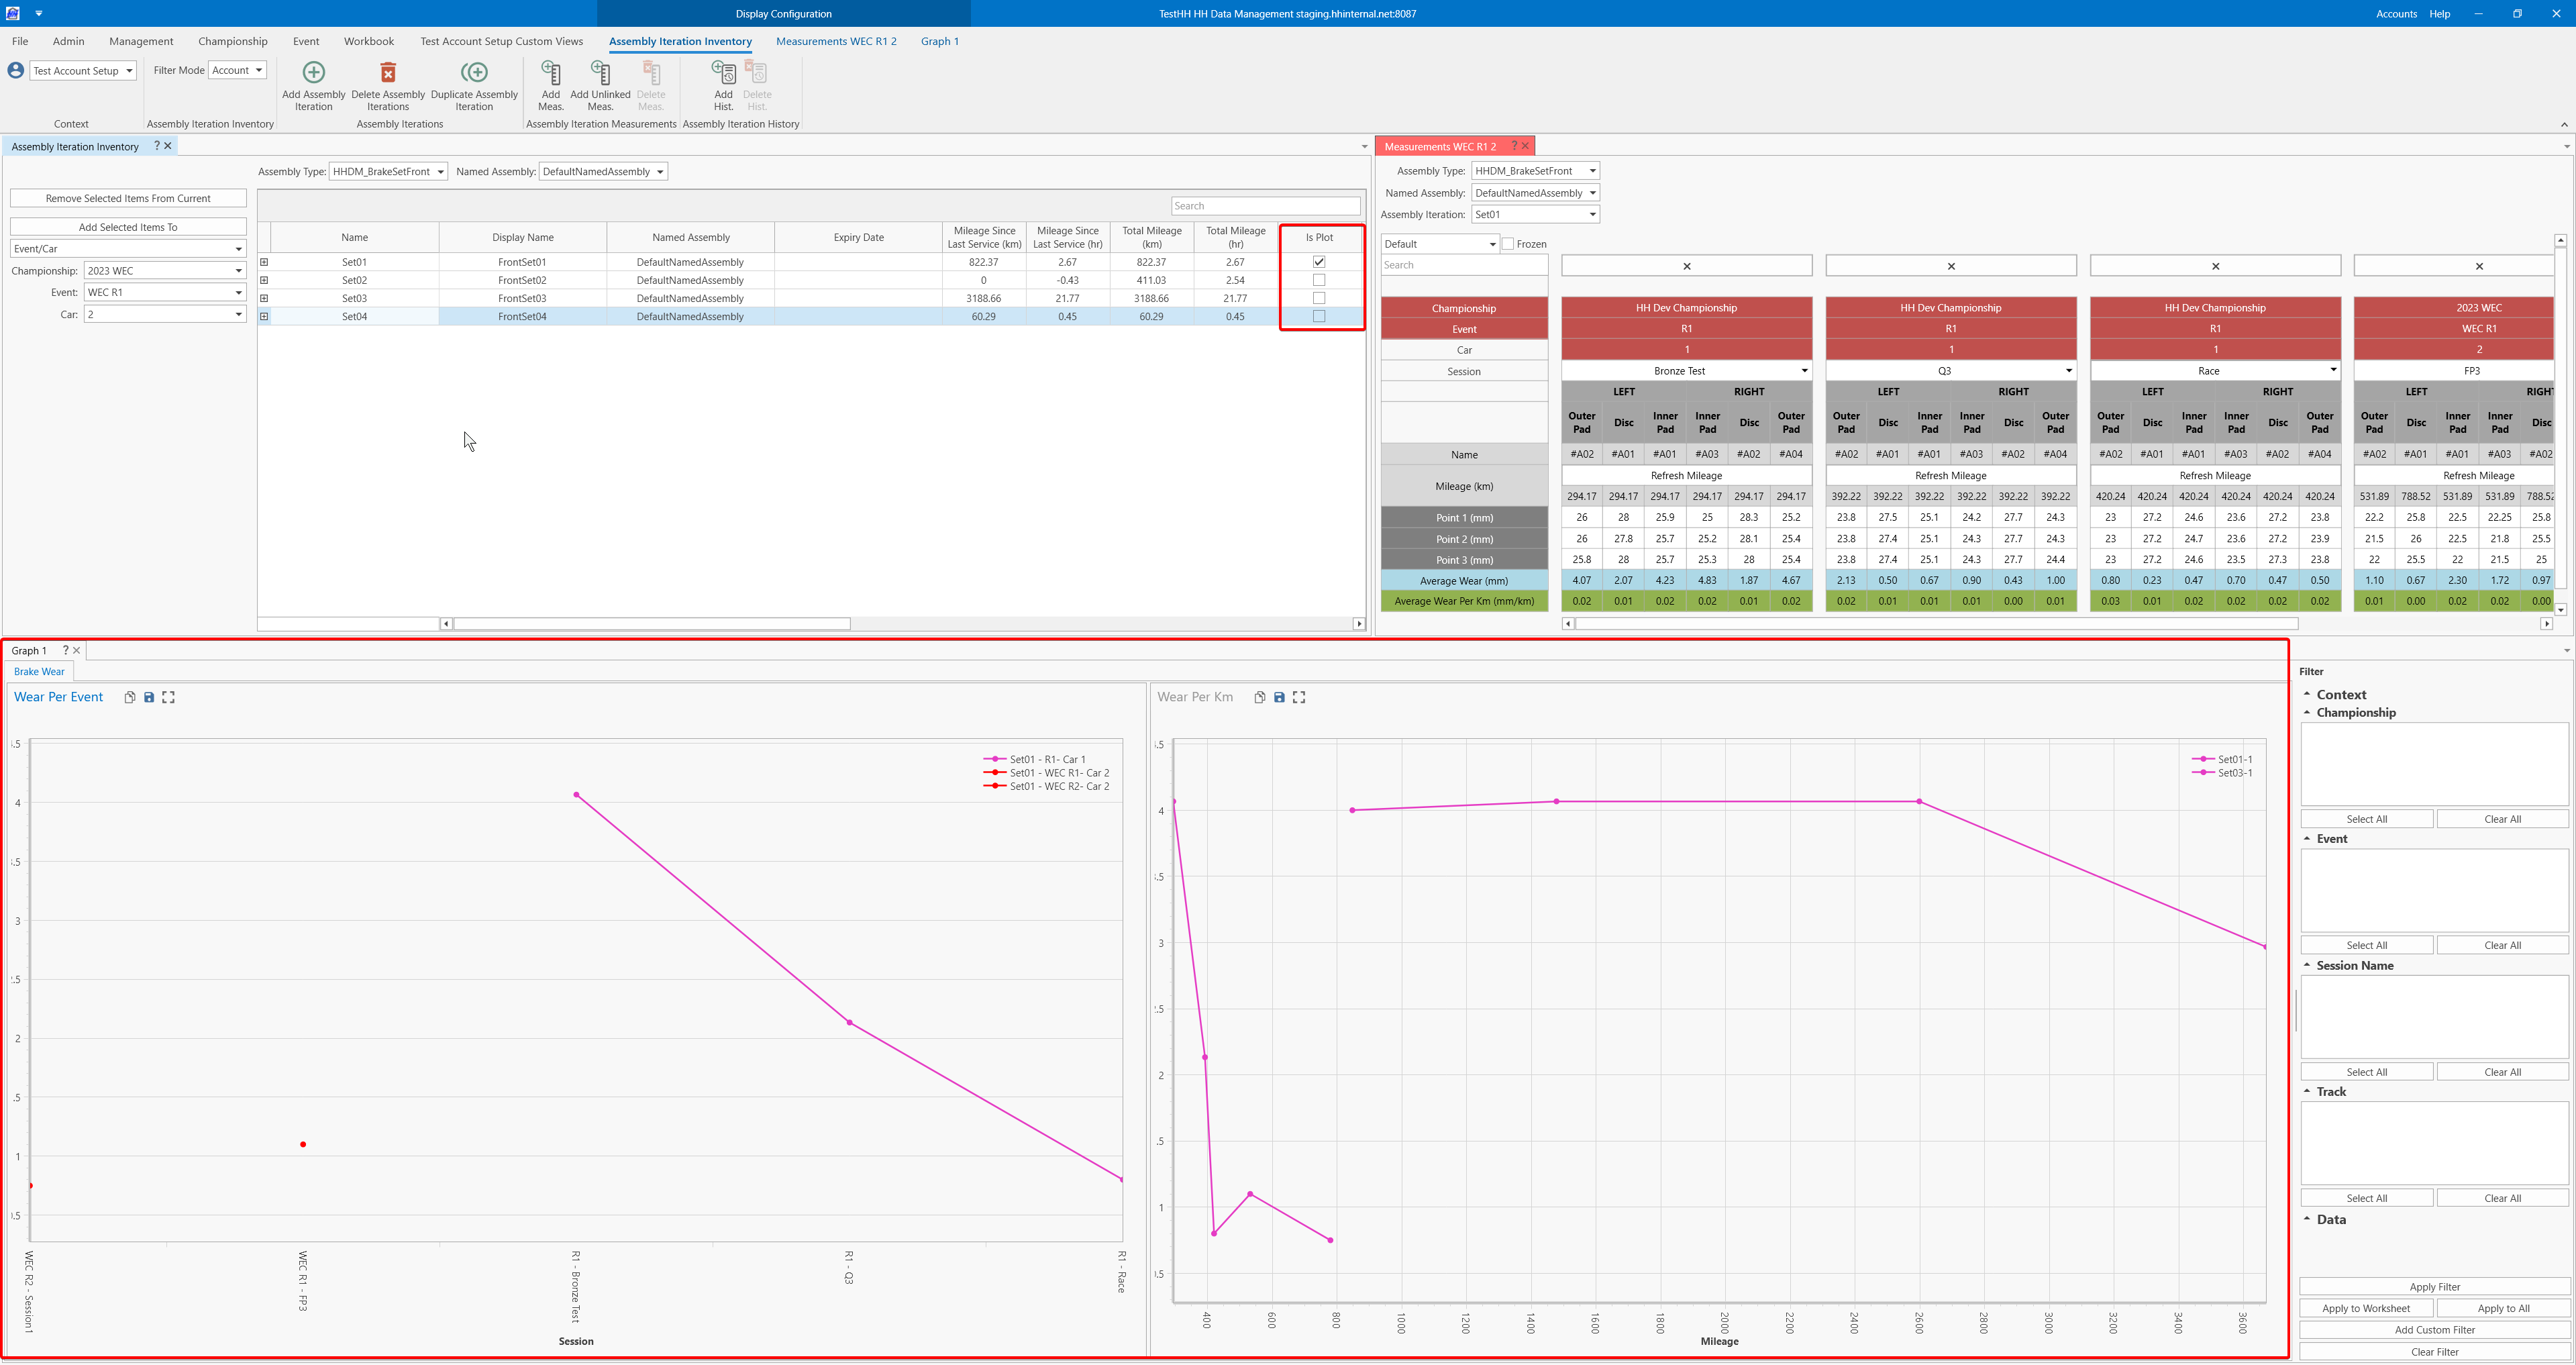
Customize the assembly iteration view
The assembly iteration view can be customized by creating a custom column profile linked to the assembly iteration definition. This example shows how to add a column with the last measurement value to be able to filter/order the brake sets depending on this value
-
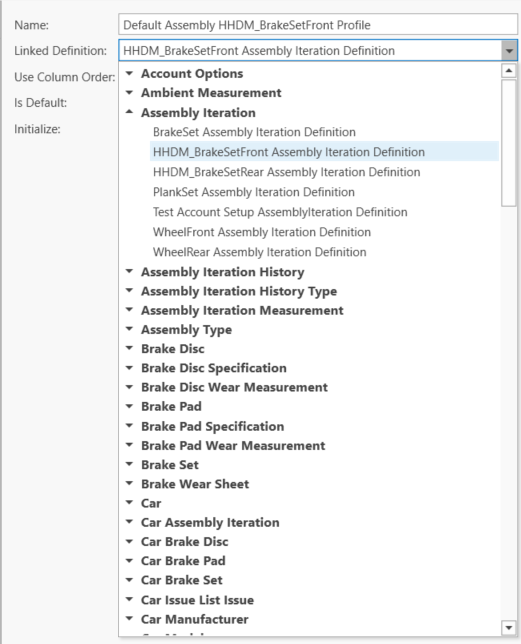
Create a new profile linked to the assembly iteration definition
-
Use the Create Default Columns button
-
Create a new text column

Plot measurements
Measurements can be plotted using the main graph control. The following steps can be followed:
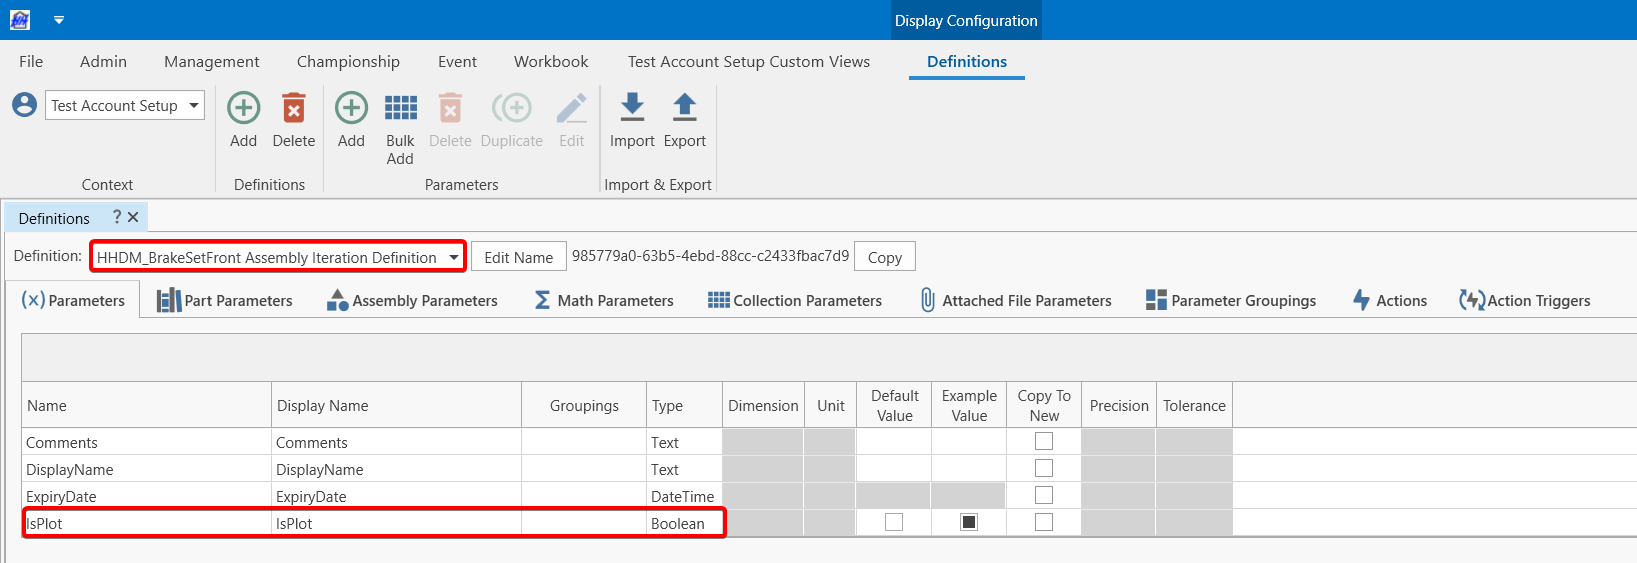
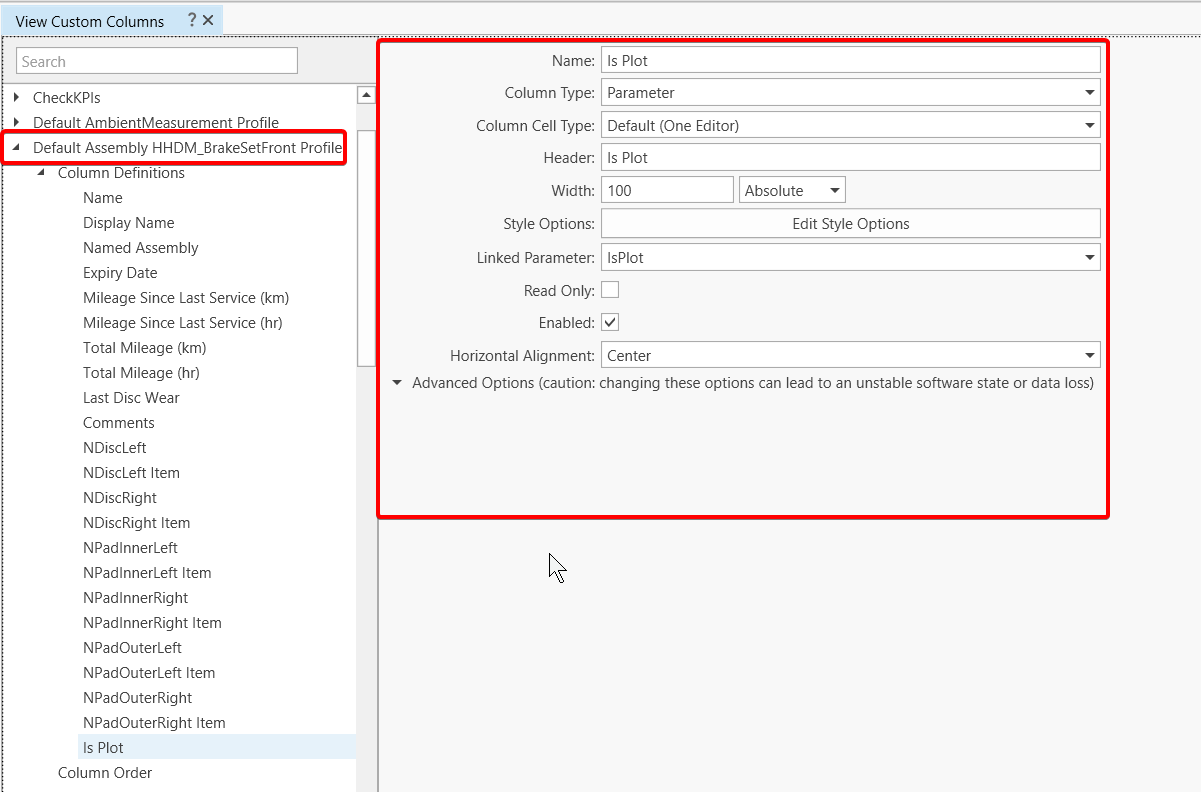
- Add a boolean parameter to define which assembly to plot
- Use the custom column profile to add the check box in the assembly iteration inventory
- Open a main graph control and edit the graph.
- Create a new data set scope profile
- Scope:
AssemblyIterations.AssemblyIterationMeasurements - Filter Expression:
AssemblyIteration.AssemblyType.Name=="HHDM_BrakeSetFront" && AssemblyIteration.IsPlot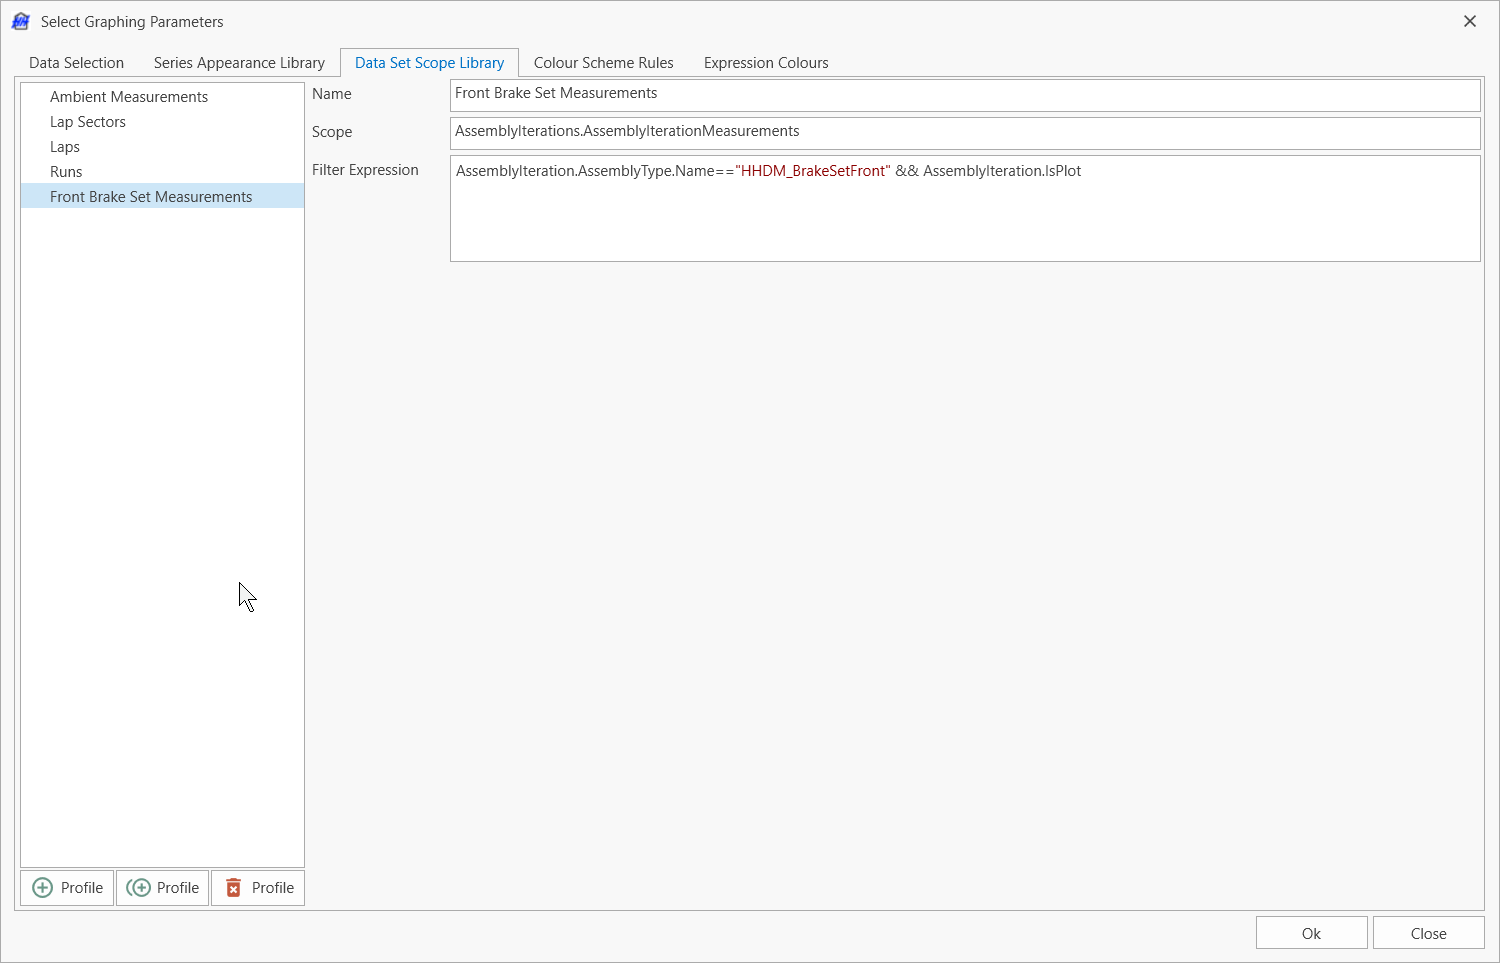
- Scope:
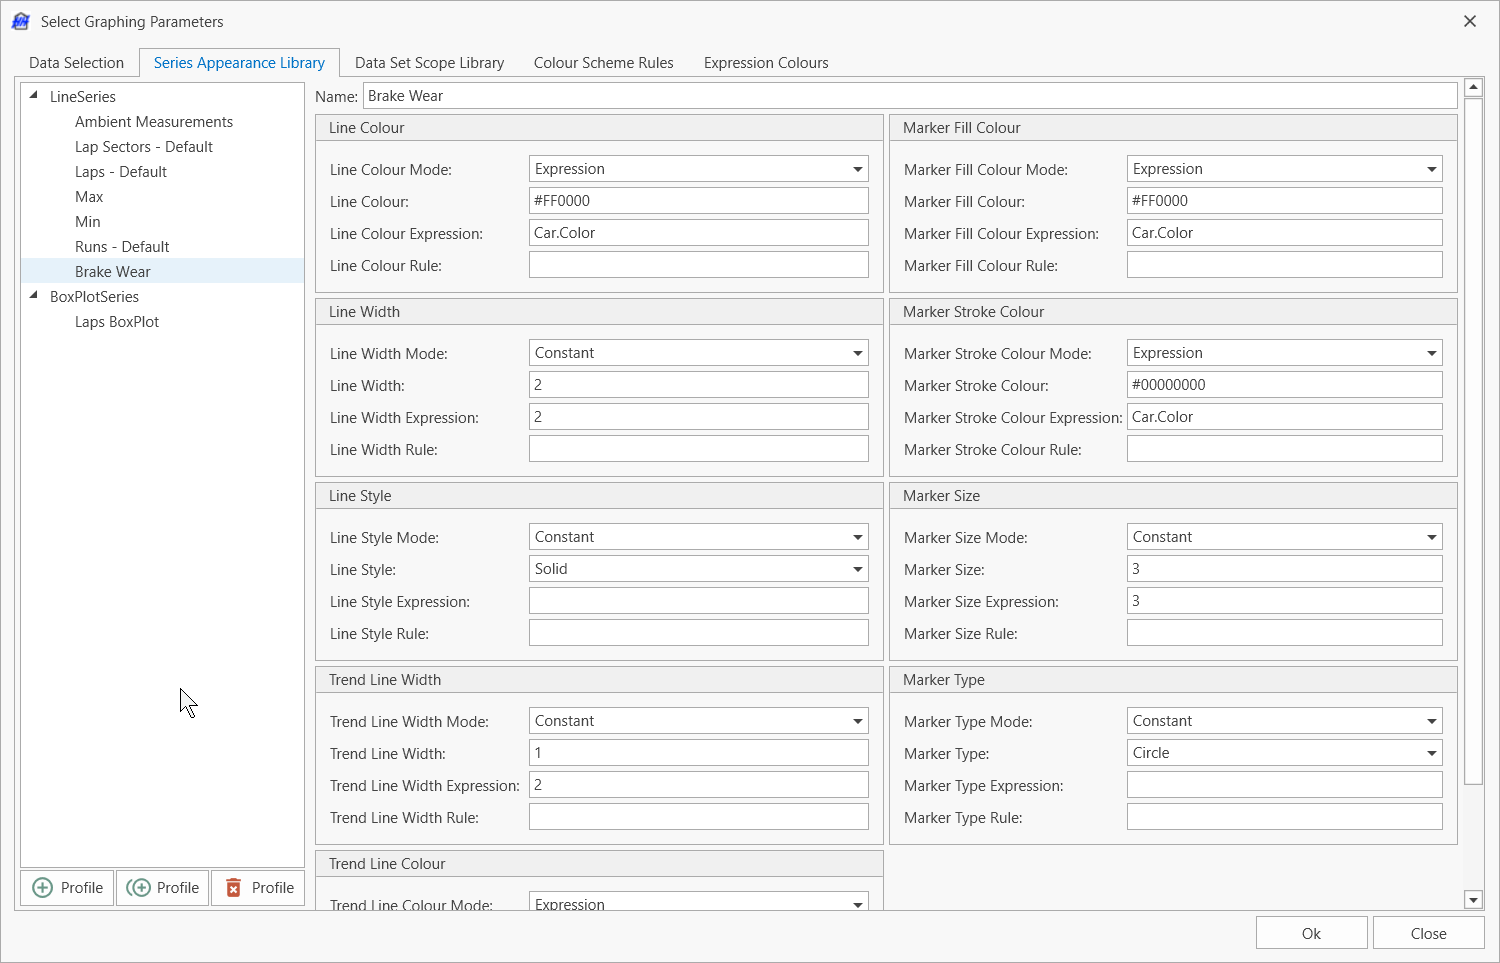
- Create a new series appearance profile
- Create a new tab, a new panel, a new data set. Edit the data Set
- Select the new scope profile created
- Select the new series appearance profile created
- Define the series scope:
Concatenate(AssemblyIteration.Id,"-",Car.Id,"-",Event.Id) - Define the series title:
Concatenate(AssemblyIteration.Name," - ",Event.Name, "- Car ",Car.Number) - Define the series ordering:
Lookup(Event.Sessions,"Id", SelectedSessionId).StartTime - Update the x-axis settings:
- Axis Format: Normal
- Data Expression:
Concatenate(Event.Name," - ",Lookup(Event.Sessions,"Id", SelectedSessionId).Name)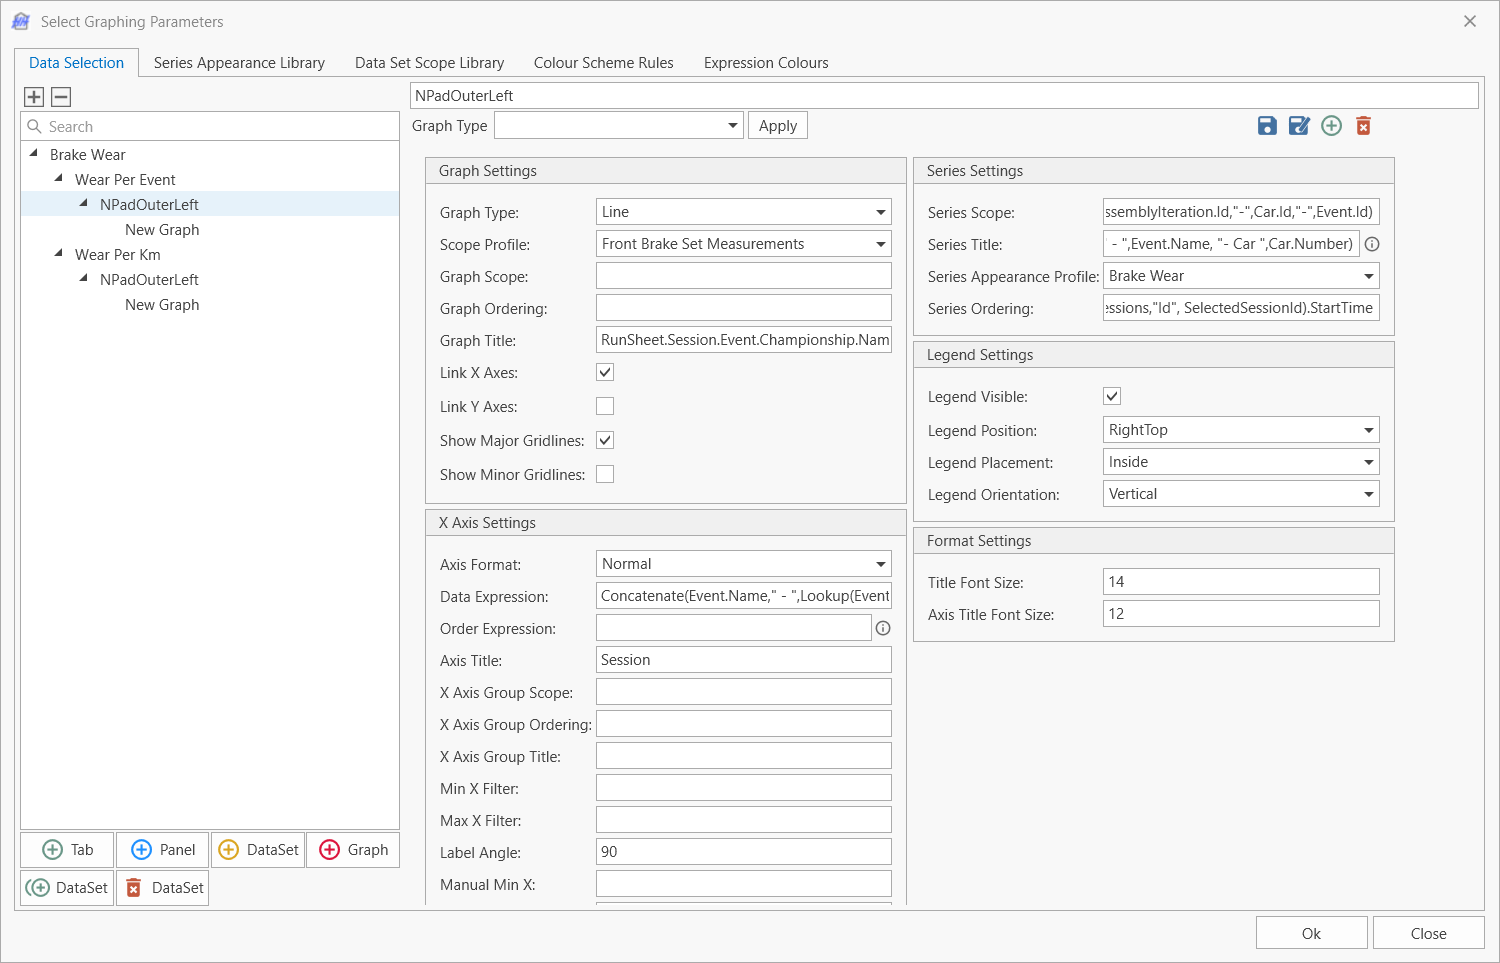 A new graph type template can be saved in the database to be reused in another main graph.
- Create a new graph and add the value to be plotted
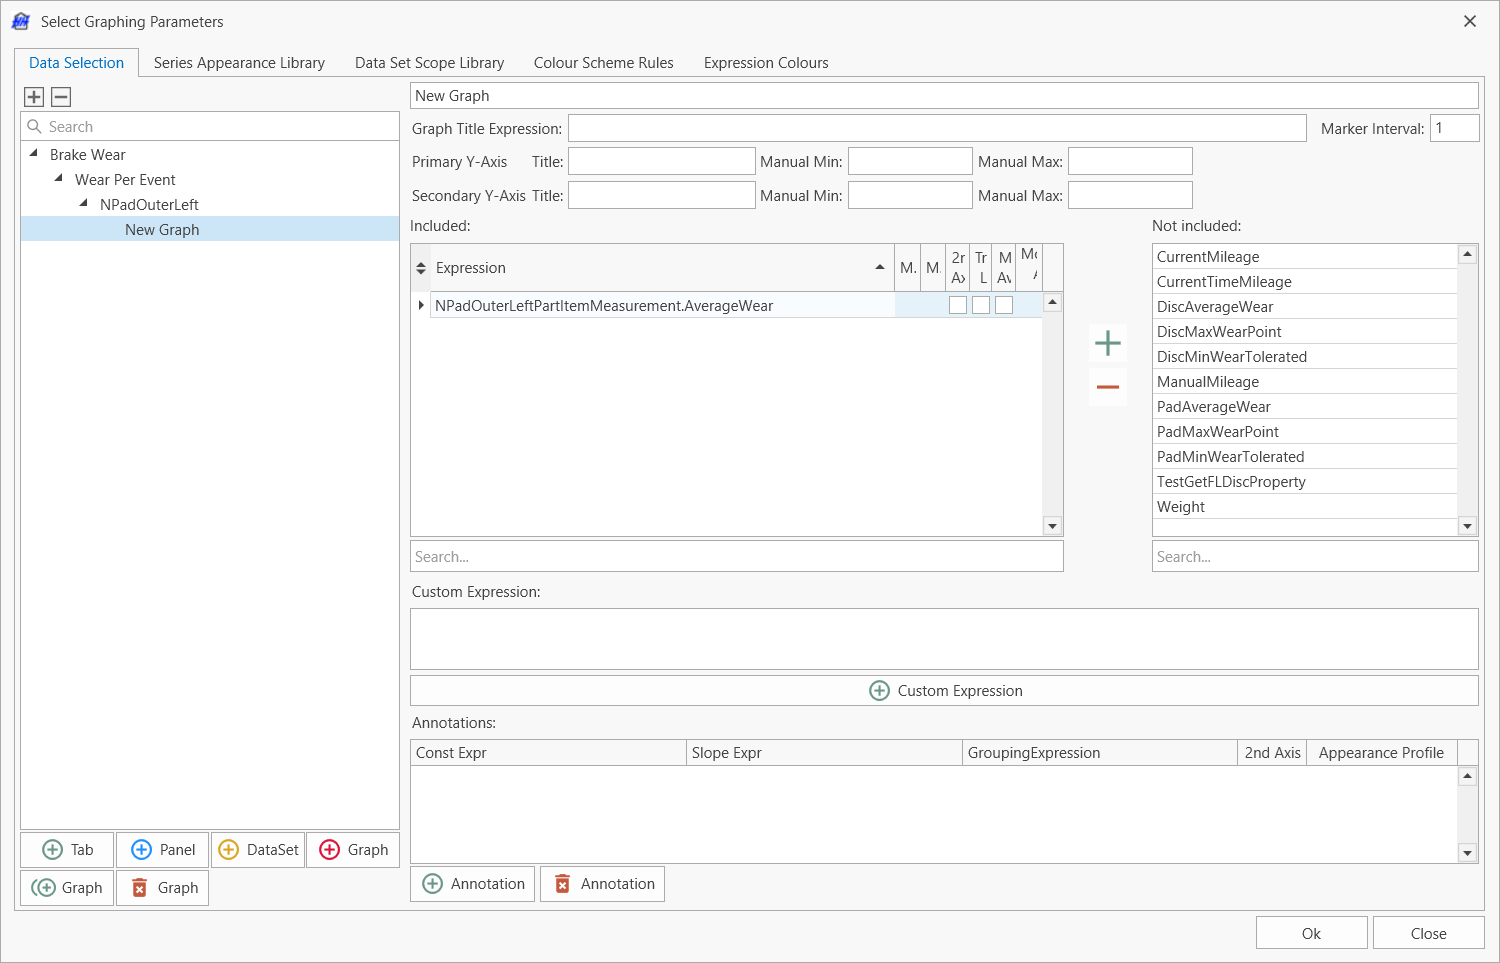
- Create a new data set scope profile
- Wear per kilometer can also be plotted:
- Series Scope:
AssemblyIteration.Id - Series Title:
Concatenate(AssemblyIteration.Name,"-",Car.Number) - X Axis data expression:
CurrentMileage
- Series Scope:
The main graph filter is not used and the assembly iteration IsPlot is used to filter the graph