Weather Station
In HH DM a weather station can be integrated to show the current values of the weather station, but also to populate the weather of the current event.

The view is split into two tabs.
Views
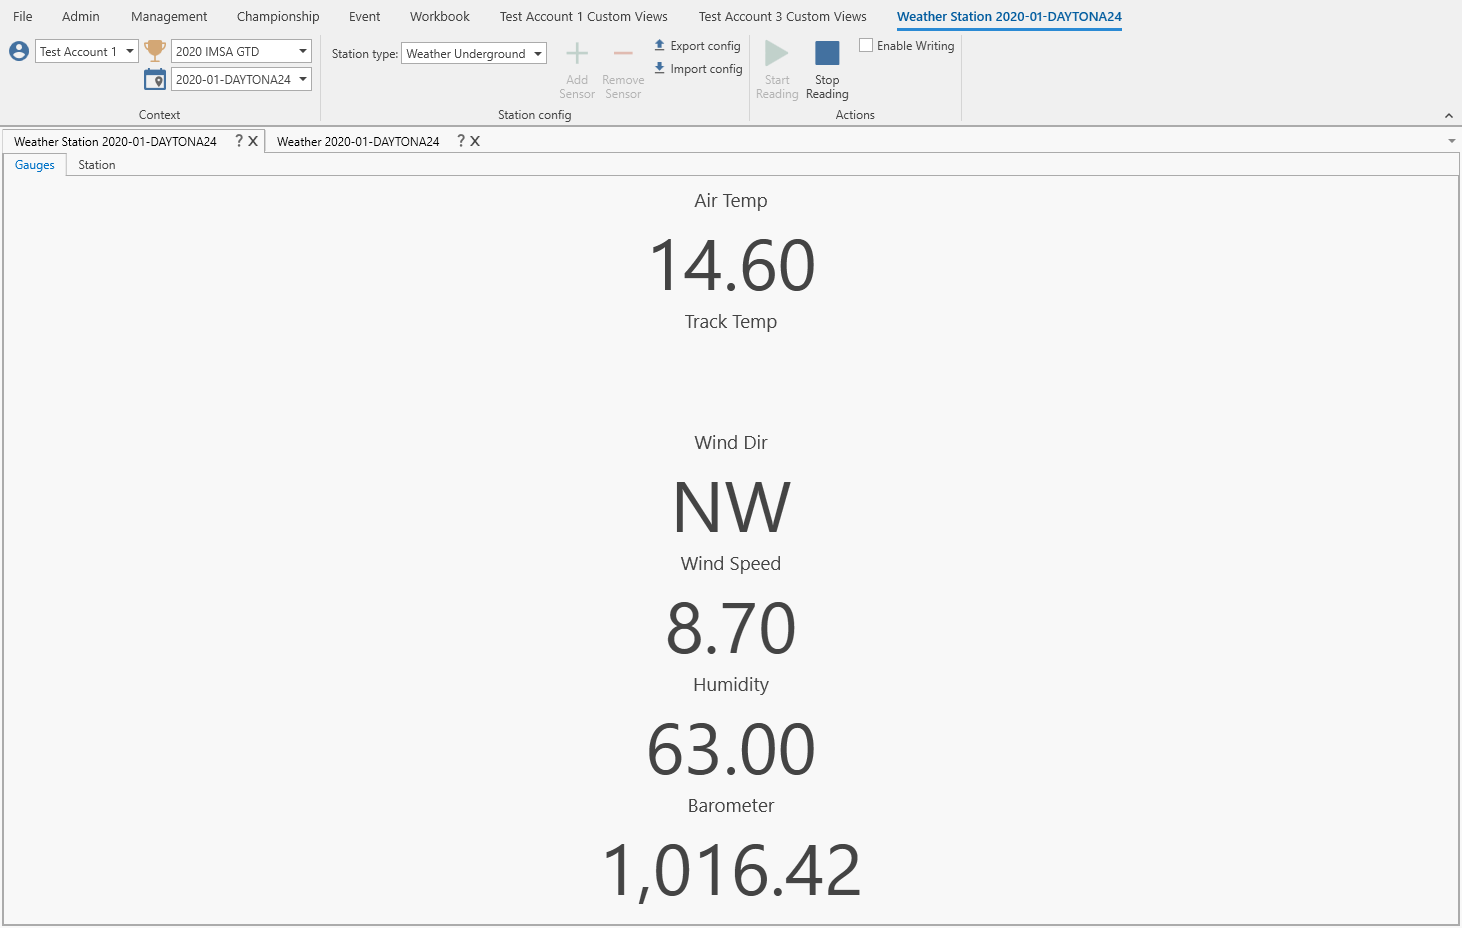
Gauges
Shows the current values of the weather station
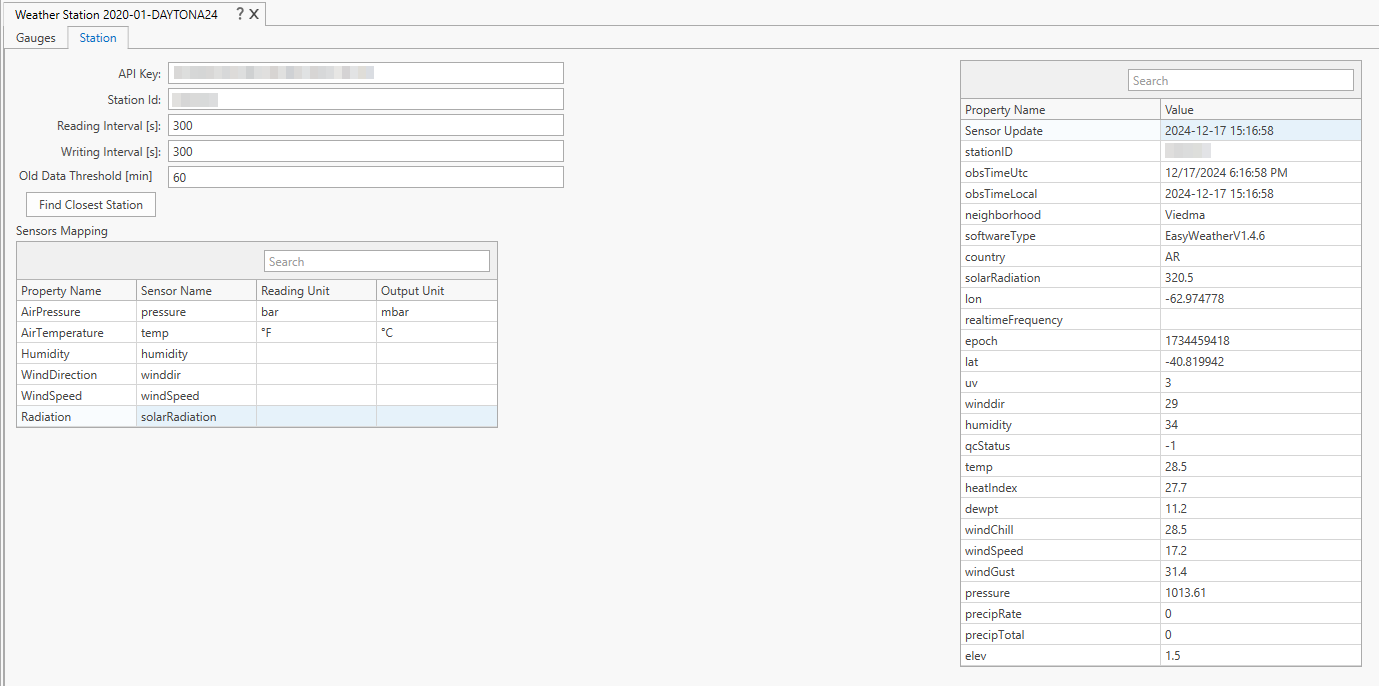
Station
The station tab is used to configure the weather station. Depending on the station type the view looks slightly different.
Configuration
The configuration section is used to set up the connection to the weather station. The configuration is saved in the layout. It can also be exported and imported with the buttons in the ribbon.
Station type
HH DM currently supports four different weather station types:
Station access
To access the weather station an API key and the station ID is required. The API key can usually be retrieved through the account of the weather station provider.

Vantage Pro
Login to https://www.weatherlink.com and then the API Key and API secret can be downloaded. Afterwards the station ID can be retrieved by clicking the Get Station Id button in the station tab.
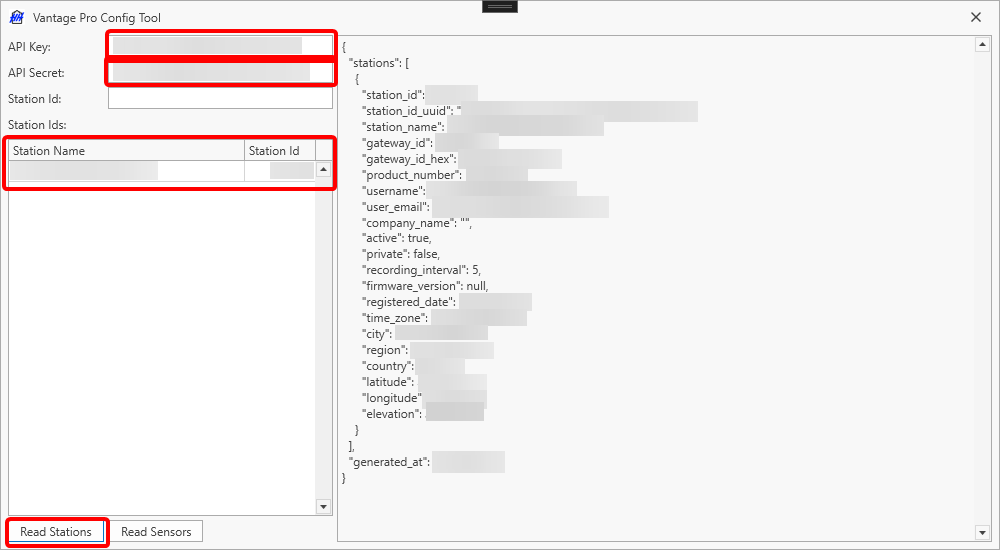
After the API key and API secret are entered, the Read Stations button can be clicked. This populates the Station Name list, where the station ID can be copied from. On the right side there are some more infos displayed as a sanity check.
If the Station ID is entered in the textbox at the top, pressing the Read Sensors button gets the latest measurements of that station.
Weather Underground
Weather Underground only provides API keys to owners of compatible weather stations. After the weather station is registered, the API key can be downloaded from https://www.wunderground.com/. The station ID for the registered weather station can also be found on the website. It's also possible to get the station ID of a different weather station by using https://www.wunderground.com/wundermap or by clicking the Find Closest Station button in the station tab. The Find Closest Station feature relies on the GPS coordinates of the track. For that to work two double parameters need to be added to the track definition.
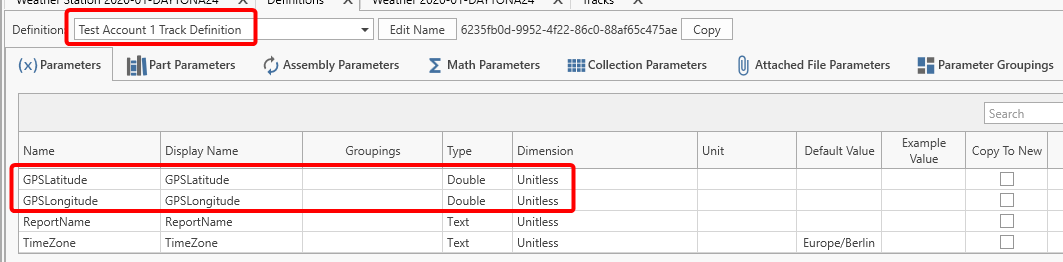
- GPSLatitude
- GPSLongitude
Afterwards two custom columns need to be added to the track profile.
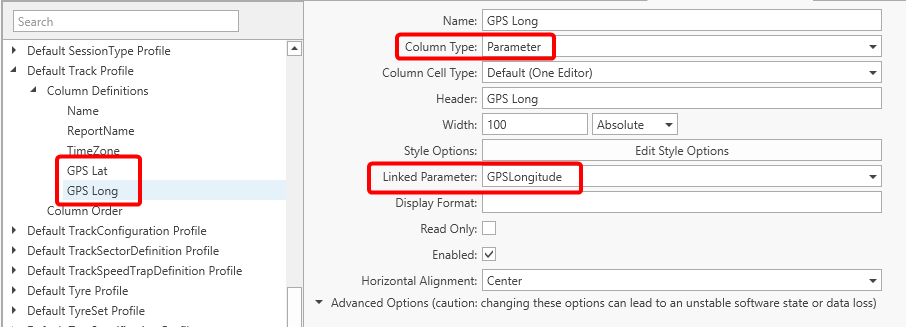
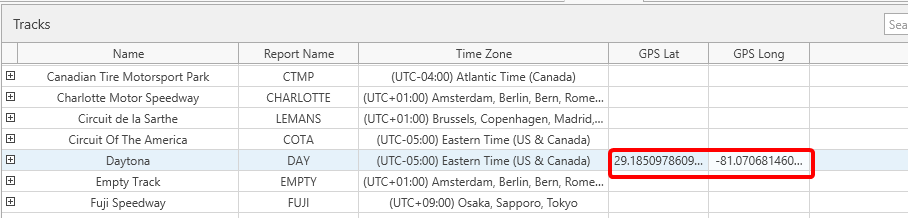
Finally the GPS coordinates can be entered in the tracks view.
Tempest
A personal access token needs to be created (https://apidocs.tempestwx.com/reference/quick-start). Afterwards the station ID can be retrieved by clicking the Get Station Id button in the station tab.
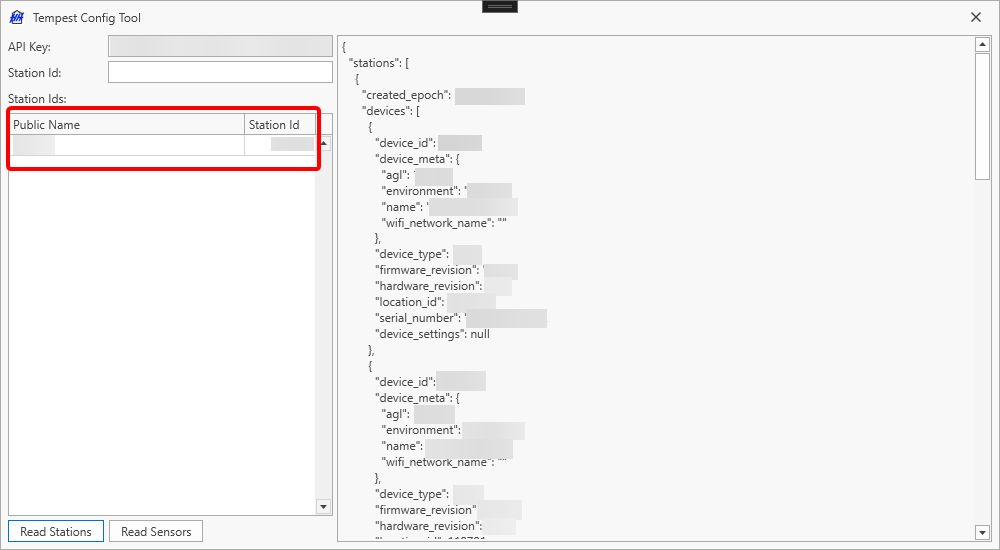
After the personal access token is entered, the Read Stations button can be clicked. This populates the Station Name list, where the station ID can be copied from. On the right side there are some more infos displayed as a sanity check.
If the Station ID is entered in the textbox at the top, pressing the Read Sensors button gets the latest measurements of that station.
Columbia Weather

Only the account name and station ID must be known and entered in their respective fields. Once these are entered, pressing the Read Sensors button gets the latest measurements of the connected station.
Sensors
The weather station view supports currently the display of the following values (with the dimension in squared brackets):
- Air Temp (Air Temperature) [Temperature]
- Track Temp (Track Temperature) [Temperature]
- Wind Dir (Wind Direction) [Angle]
- Wind Speed [Speed]
- Humidity [Ratio]
- Barometer (Air Pressure) [Pressure]
However the sensors are not only used for the weather station view, but the values can also be written into the weather of the current event. For that the Ambient Measurement definition needs to contain a parameter with the same name as the Property Name (see explanation below) of the sensor.
As every weather station names its sensors slightly different a mapping needs to be configured. This mapping is configured in the station tab of the view. The sensors mapping table needs to be populated accordingly:

- Property Name - the target name of the sensor (i.e. one of the names of the list above to populate the gauges or a custom name)
- Sensor Name - the name how it is coming from the weather station
- Reading Unit - the unit in which the sensor value is coming from the weather station (see units for supported units for the current dimension, values entered here must not include brackets or quotes)
- Output Unit - the unit in which the sensor value should be converted to (see units for supported units for the current dimension, values entered here must not include brackets or quotes)
To enable the unit conversion both units need to be entered and they both need to be from the same dimension. Otherwise the raw values from the weather station will be used.
Sensors can be added or removed with the buttons in the ribbon.
Reading and writing sensor values
Reading and writing can be controlled with the buttons in the Actions group of the ribbon. In the station tab there are parameters to define the interval(s) and a timeout.
- Old Data Threshold: defines a timeout (in minutes) after which a sensor value is considered to be invalid. This means if the value is set to 60 minutes, and a sensor hasn't updated since more than 60 minutes, then the value is discarded.
- Reading Interval [s]: defines the interval in seconds, at which HH Data Management reads sensor data from the weather station. For example, if set to 60 seconds, the system will fetch sensor values every 60 seconds.
- Writing Interval [s]: defines the interval in seconds, at which the sensor values are getting written to the database if Enable Writing is checked. The Writing Interval needs to be a multiple of the Reading Interval. For example, if the Reading Interval is set to 60 and the Writing Interval it set to 300, then after every fifth sensor reading the values are getting written into the database.
Start/Stop Reading
Starts/stops reading sensors and populates values in the gauges tab.
Enable Writing
Enables writing the sensor values into the weather of the current event. That means when writing is enabled, for each reading a line in the weather view is created.